This article shows admins how to add, edit, and close stores and manage when stores can transfer products to each other.
Overview
The Stores Maintenance functionality gives Decision Logic admins the ability to configure a store, such as inventory sets, menu sets, distributors, and IUT partners, assign order guides, see which units are opened/closed to bill appropriately, and more!
You Users must configure the Company Hierarchy in advance to add a store in Store Maintenance.
Please reach out to your Decision Logic admin for change requests.
Site Menu Navigation
Maintenance > Company > Stores
High-Level View
DL admins can add New stores, Edit and Delete information from the main landing page, and sort the displayed information by clicking the header for each column.
Columns available are:
Customer ID
Store (name)
Company
Region
Area
Universal Data Transfer (UDT) ID
Tipped
Your store’s tipped job (role) minimum wage enables the ‘wage adjustment’ flag on Payroll Report.
Non-Tipped
Your store’s non-tipped (role) minimum wage enables the ‘wage adjustment’ flag on Payroll Report.
Status


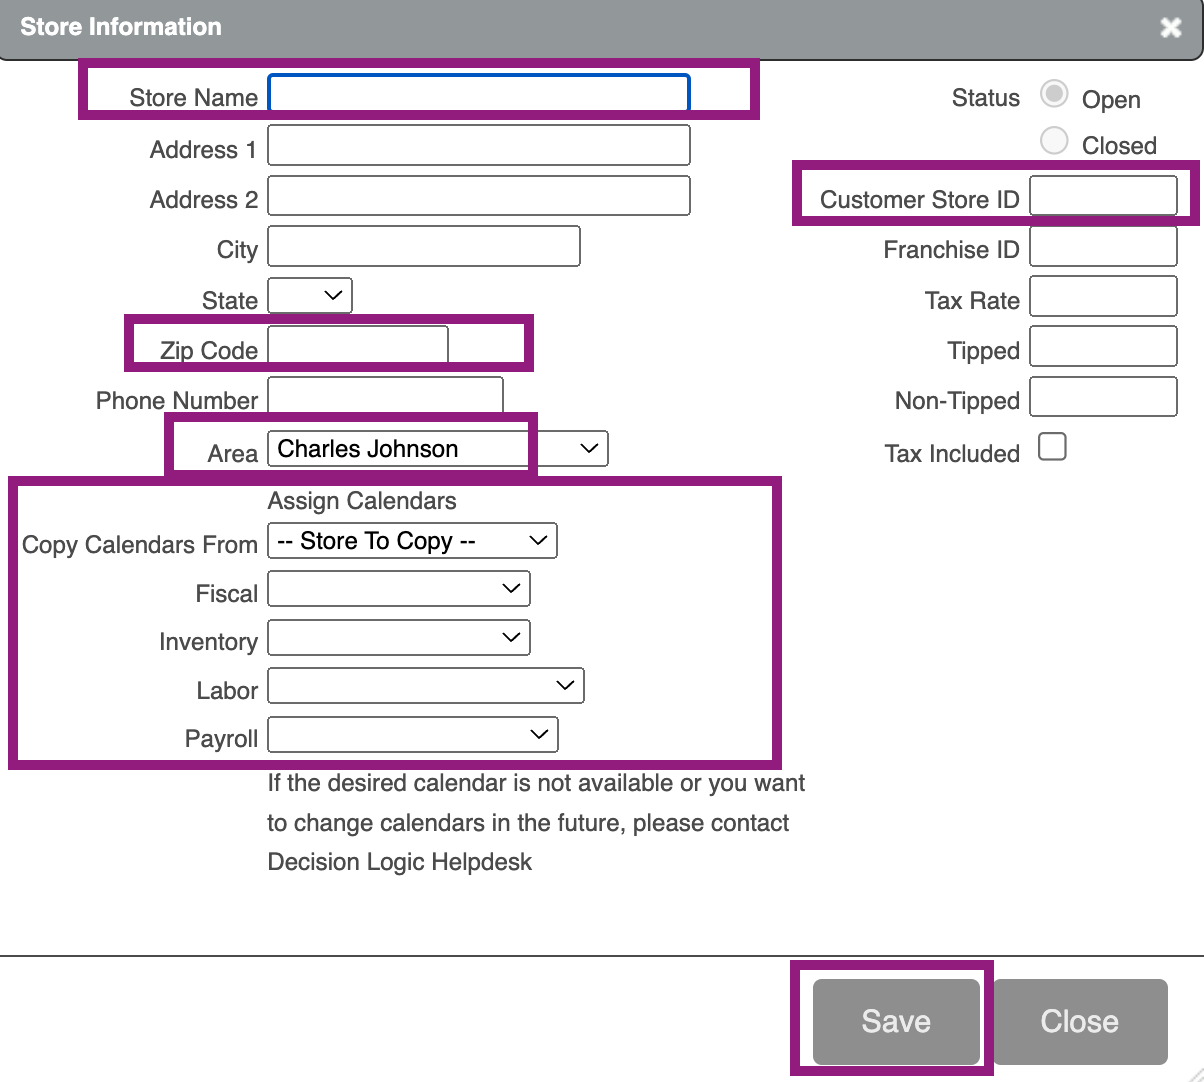
Add New Store
Adding and mapping a new store is quick and easy. From the Stores Maintenance landing page, please follow these steps.Begin by navigating to:
Maintenance > Company > Stores
Click New.

Input all pertinent information. The minimum information that needs to be included
is Store Name, Area (Group),
Customer ID, Zip Code and Calendar selections.
Businesses utilizing Decision Logic’s Payroll Report are required to add the Tipped and Non-Tipped information.
Click Save.

![]()
| Info |
|---|
Adding a store to an area is a prerequisite to adding it to an order guide. |
The order guide setup will not allow you to add stores that do not have an area assignment. |
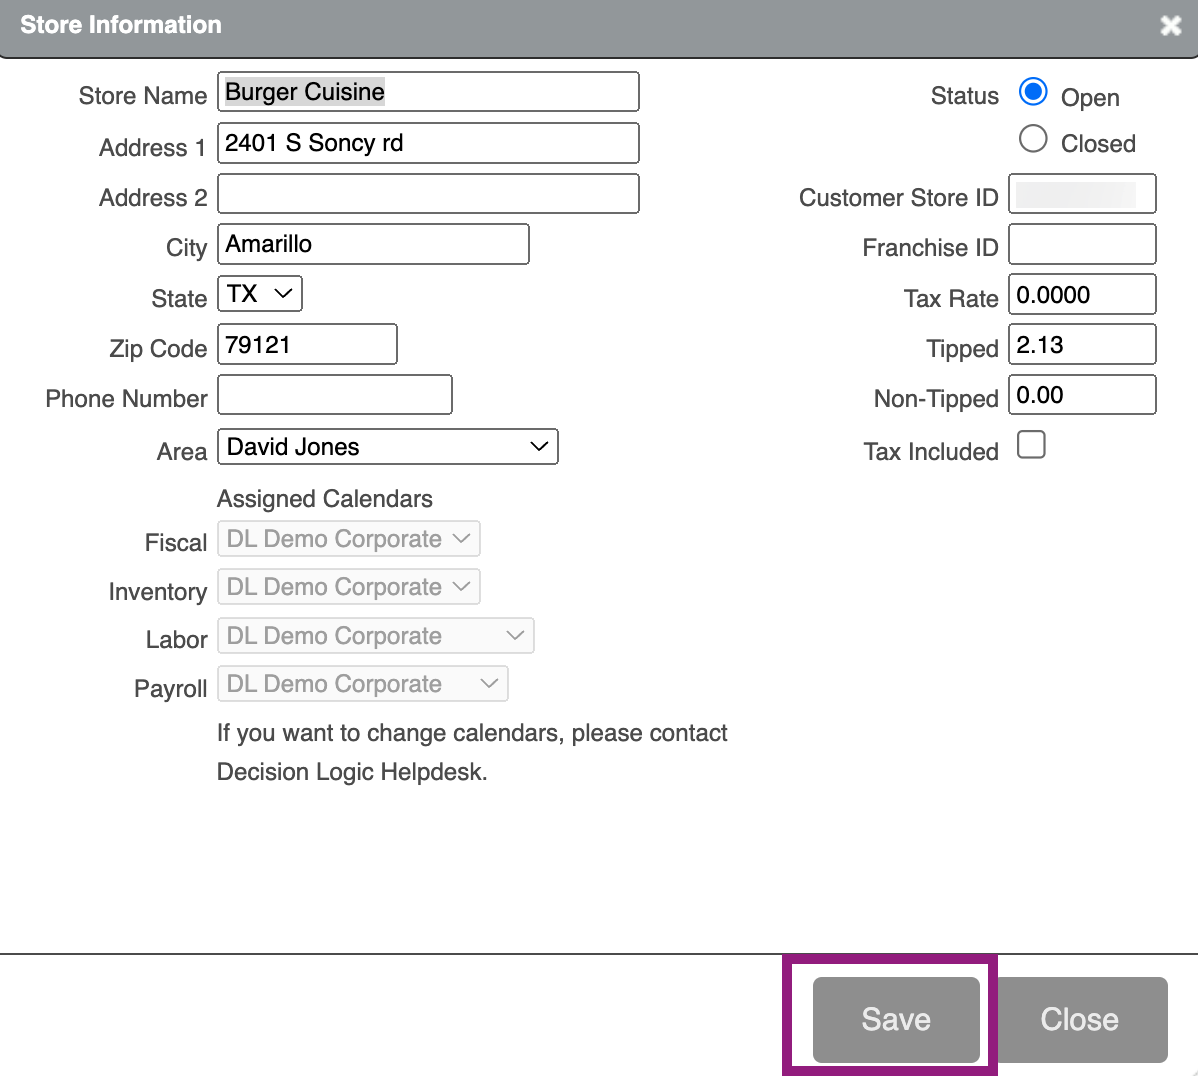
Edit Store
Editing a store’s information is similar to adding a new store. From Store Maintenance’s landing page, follow these quick steps.Begin by navigating to:
Maintenance > Company > Stores
Highlight the store line you would like to edit.
Click Edit.

Update all pertinent information
, excluding Assign Calendars. Users will need to contact Decision Logic’s Service Center to edit calendars.
Click Save.
Close a Store
There may be a time when a store is temporarily or permanently closed. In that event, you will need to update its Status for accurate Decision Logic reporting. ![]() First, to Additionally, you must email Decision Logic to the two following email addresses:
First, to Additionally, you must email Decision Logic to the two following email addresses:
accounting@decisionlogic.co
Helpdesk@decisionlogic.co
Each email needs to include the following information for each store closing:
Brand / Concept
Store Number
Closing Date
Customer Legal Name
| Info |
|---|
To close a store and preserve its historical reporting, users will need to create a new |
group labeled “Closed” in theHierarchy Maintenance. Then change the store’s mapping to the |
‘Closed’ area. |
![]() If a store is removed from an Area, it will not appear in any Decision Logic reports. The store must be assigned to an area to see the historical data.
If a store is removed from an Area, it will not appear in any Decision Logic reports. The store must be assigned to an area to see the historical data.
Please follow these steps to close a store or re-open a store.
Highlight the store line you intended to mark as closed.
Click Edit.
Change the Status from Open to Closed (or Closed to Open if re-opening).
Change the Area to Closed.
Click Save.

Then choose Yes or No on the popup box.
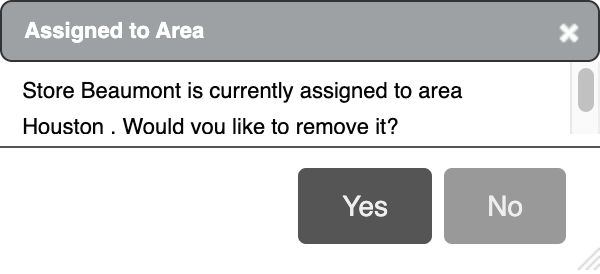
No means that the store will continue to appear in any applicable reporting, except Missing Files. The store will be available in dropdown menus and reporting for users who have the store within the Scope of their assigned Profile. This is maintained in Profile Maintenance.
Yes means that the store and its associated data will not appear in reporting or be available in dropdown menus for any users.
Manage Order Guides & Distributors
To continue setting up a New store, you will want to assign this store to distributors.
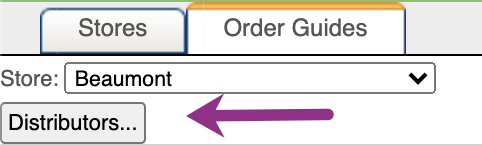
From the main landing page, Highlight the store line you intended to add distributors.
Either select the Order Guides tab at the top of the page or select a store line and click Manage Order Guides below.
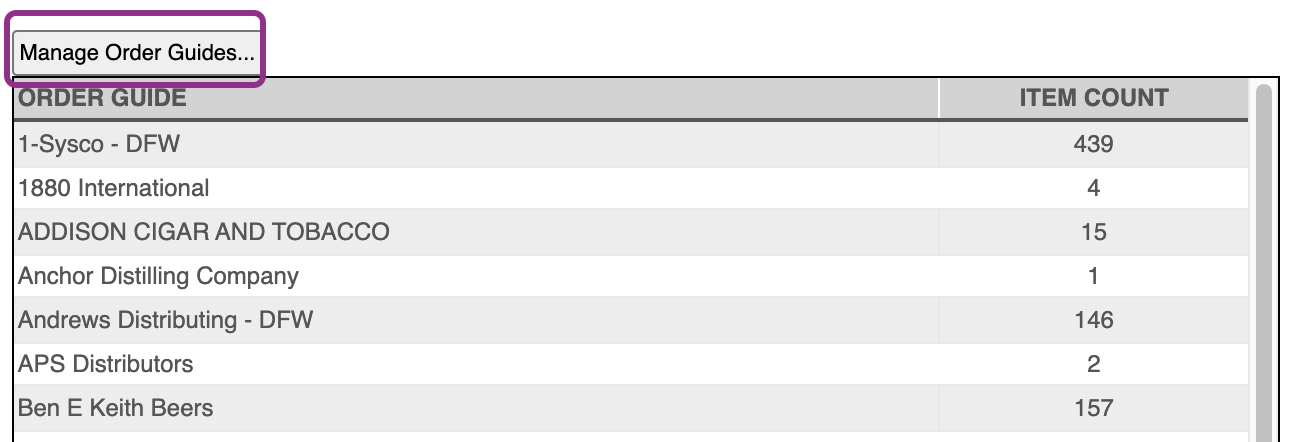
Click Distributors

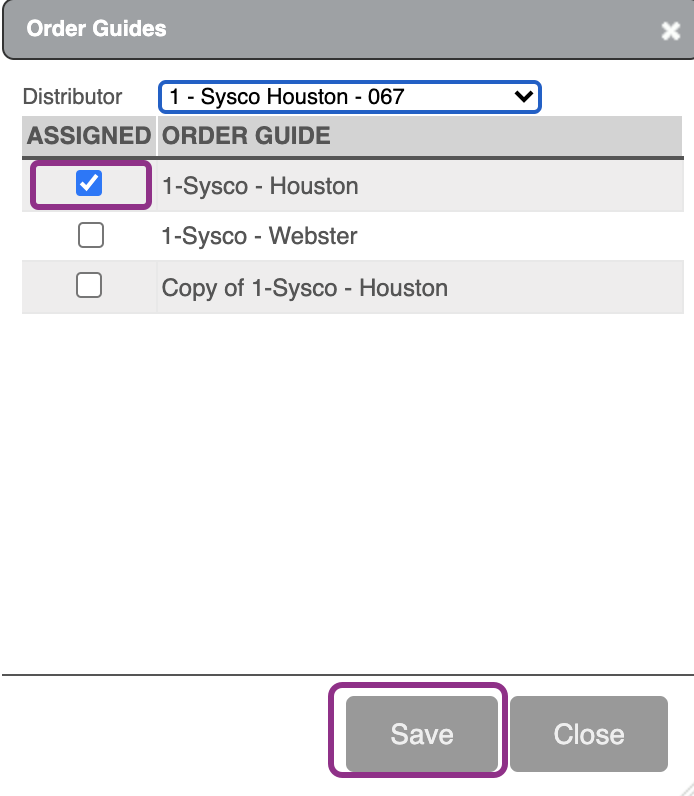
Make the necessary adjustments: Check the appropriate box in Assigned, enter the unique Customer Number provided by the distributor, Customer Store, and the number of Delivery Delays.


Select Save. You may add as many distributors as you need for this store.
Below the newly added distributor, click Add Order Guide


From the Distributor drop-down list, check the Assigned box next to the appropriate distributor.
Click Save.
| Info |
|---|
You will want to call your distributor to arrange a test order and ensure they do not fulfill it. |
Manage Inventory Sets
Please follow these steps from the Store Maintenance landing page to adjust the Inventory Sets.
Highlight the store line you intended to make changes to.
Click Manage Inventory Sets

Check the Assigned box next to the Inventory Set you would like to include
Click Save

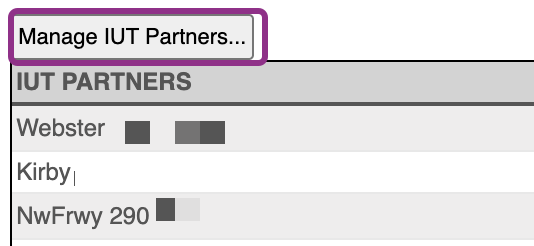
Manage IUT Partners
IUT Partners allow new stores to have inter-unit transfer privileges.
Please follow these steps from the Store Maintenance landing page to adjust the IUT Partners.
Highlight the store line you intended to make changes to.
Click Manage IUT Partners.
 submit
A pop-up window will load, allowing the user to define the IUT partners to be chosen from. Highlight a location within Available.
Click the arrow in the middle to move the Available store to Current Partners.
You can also double-click your mouse or drag and drop stores from one box to another.
The Double Right and Double Left arrows will move all menu items to the Current Partners list.
Click Save.

| Info |
|---|
Submit a support ticket with the help desk by visiting our Decision Logic Service Center. This allows Decision Logic to set up the newly added store for Decision Logic Data Transfer services and provide you with the unique internal DL store number. You will need this unique number when installing the Data Transfer software on the POS server at the store. |
After this is complete, you will need to add your store to POS Admin. Please see the POS Admin article.
© 2023 Knowledge Management Systems, LLC. Decision Logic. All Rights Reserved.
Table of Contents
| Table of Contents |
|---|
| Info |
|---|
For additional questions or assistance, please submit a support ticket by visiting the Decision Logic Service Center |
. |