Versions Compared

Key

  • This line was added.
  • This line was removed.
  • Formatting was changed.

This article provides information and steps to enter and post a regular inventory through the web browser for clients who migrated to Decision Logic’s V6 platform.

Overview

Inventory is a complete list of all the items or raw materials required to prepare dishes, including food, ingredients, prepped, items, spices, paper items, cleaning supplies, linens, merchandise, liquor, beverages, etc.  Counting inventory helps track the ingredients coming in and out of your restaurant.

Hot item inventory are daily counts that occur at the beginning of each day before sales are entered into the Point of Sale (POS).  This type of inventory is different from regular inventory.  Check out this article for more information about Hot Item Inventory.

Decision Logic provides two avenues when entering and posting inventory:

Table of Contents

Table of Contents
maxLevel4
absoluteUrltrue
Info

For additional questions or assistance, please submit a support ticket by visiting the Decision Logic Service Center.

Video

Check out this video on entering and posting regular inventory or keeping reading.

Widget Connector
overlayyoutube
_templatecom/atlassian/confluence/extra/widgetconnector/templates/youtube.vm
width400px
urlhttps://www.youtube.com/watch?v=bo-5umIvHGA
height300px

When to Count & Post Inventory

Each brand determines the frequency stores should count and post regular inventory. For example, weekly, monthly, bi-monthly, quarterly, etc. Stores must have at least two inventories entered into Decision Logic’s platform for reports and variance to populate and be accurate. 

Missed inventory will result in inaccurate data for reporting. This prevents operators from making informed decisions for their store(s). If your store must skip counting inventory, they will still need to Post a zeroed inventory.

Reports that are affected are:

  • Cost of Goods Sold (COGS)

  • Ideal vs. Actual Usage (IvA)

  • Theoretical vs. Actual Usage (TvA)

  • Cost & Variance

  • Shelf Extensions


Typically brands define a ‘week’ as Monday - Sunday, with Monday morning being the day ‘regular inventory' is posted.

For example:

Monday - Sunday is the week defined. Monday is regular inventory day. Operators can count after the closing of business on Sunday or early Monday morning. They will post Monday morning after sales have been imported from Sunday and before sales are entered on the POS Monday morning.

Info

The key takeaway is users should post the morning of the regular inventory day. All sales from the previous day need to be imported into Decision Logic’s platform before posting. 

Info

If a brand wants to change the day of their inventory cycle, which is their calendar management, they need to contact the Decision Logic Service Center.

Enter & Post Inventory

Info

Before you begin counting, Decision Logic recommends that you sort your inventory guide from sheet to shelf. This will make counting faster with less room for error.

Inventory items may be counted in multiple locations. Decision Logic’s platform will sum all the counts entered for items counted in multiple locations. Follow the steps below to enter and post regular inventory.

Navigate to:

Operations > Inventory > Inventory Home

  1. Select a Store if you have access to multiple locations.

  2. Define the Date Range. The results show:

    1. Type of inventory, such as regular or Hot Item Inventory.

      1. Flame Icon:  represents Hot Item Inventory and will appear on the Hot Item Inventory guide.

    2. Date inventory should be taken and posted.

    3. Status of an inventory, such as In-Process or Posted.

    4. Start date of an inventory in process or posted.

    5. Who started the inventory.

    6. When the inventory was Posted.

    7. Who posted inventory.

    8. Any Change Requests submitted.

    9. Action item options.

  3. Click Enter Inventory.

  4. Select the Inventory Type ‘regular inventory’.

  5. Select the Inventory Date. Only the dates available to post inventory will appear. Additionally, there is a legend notating the status of post inventory dates for the month.

    1. Red:  The current date.

    2. Light blue:  Inventory is in process and needs completing.

    3. Yellow:  Inventory is in review and needs completing.

    4. Green:  Inventory has been posted.

    5. Dark blue:  Inventory date that is selected.

  6. Click Next.

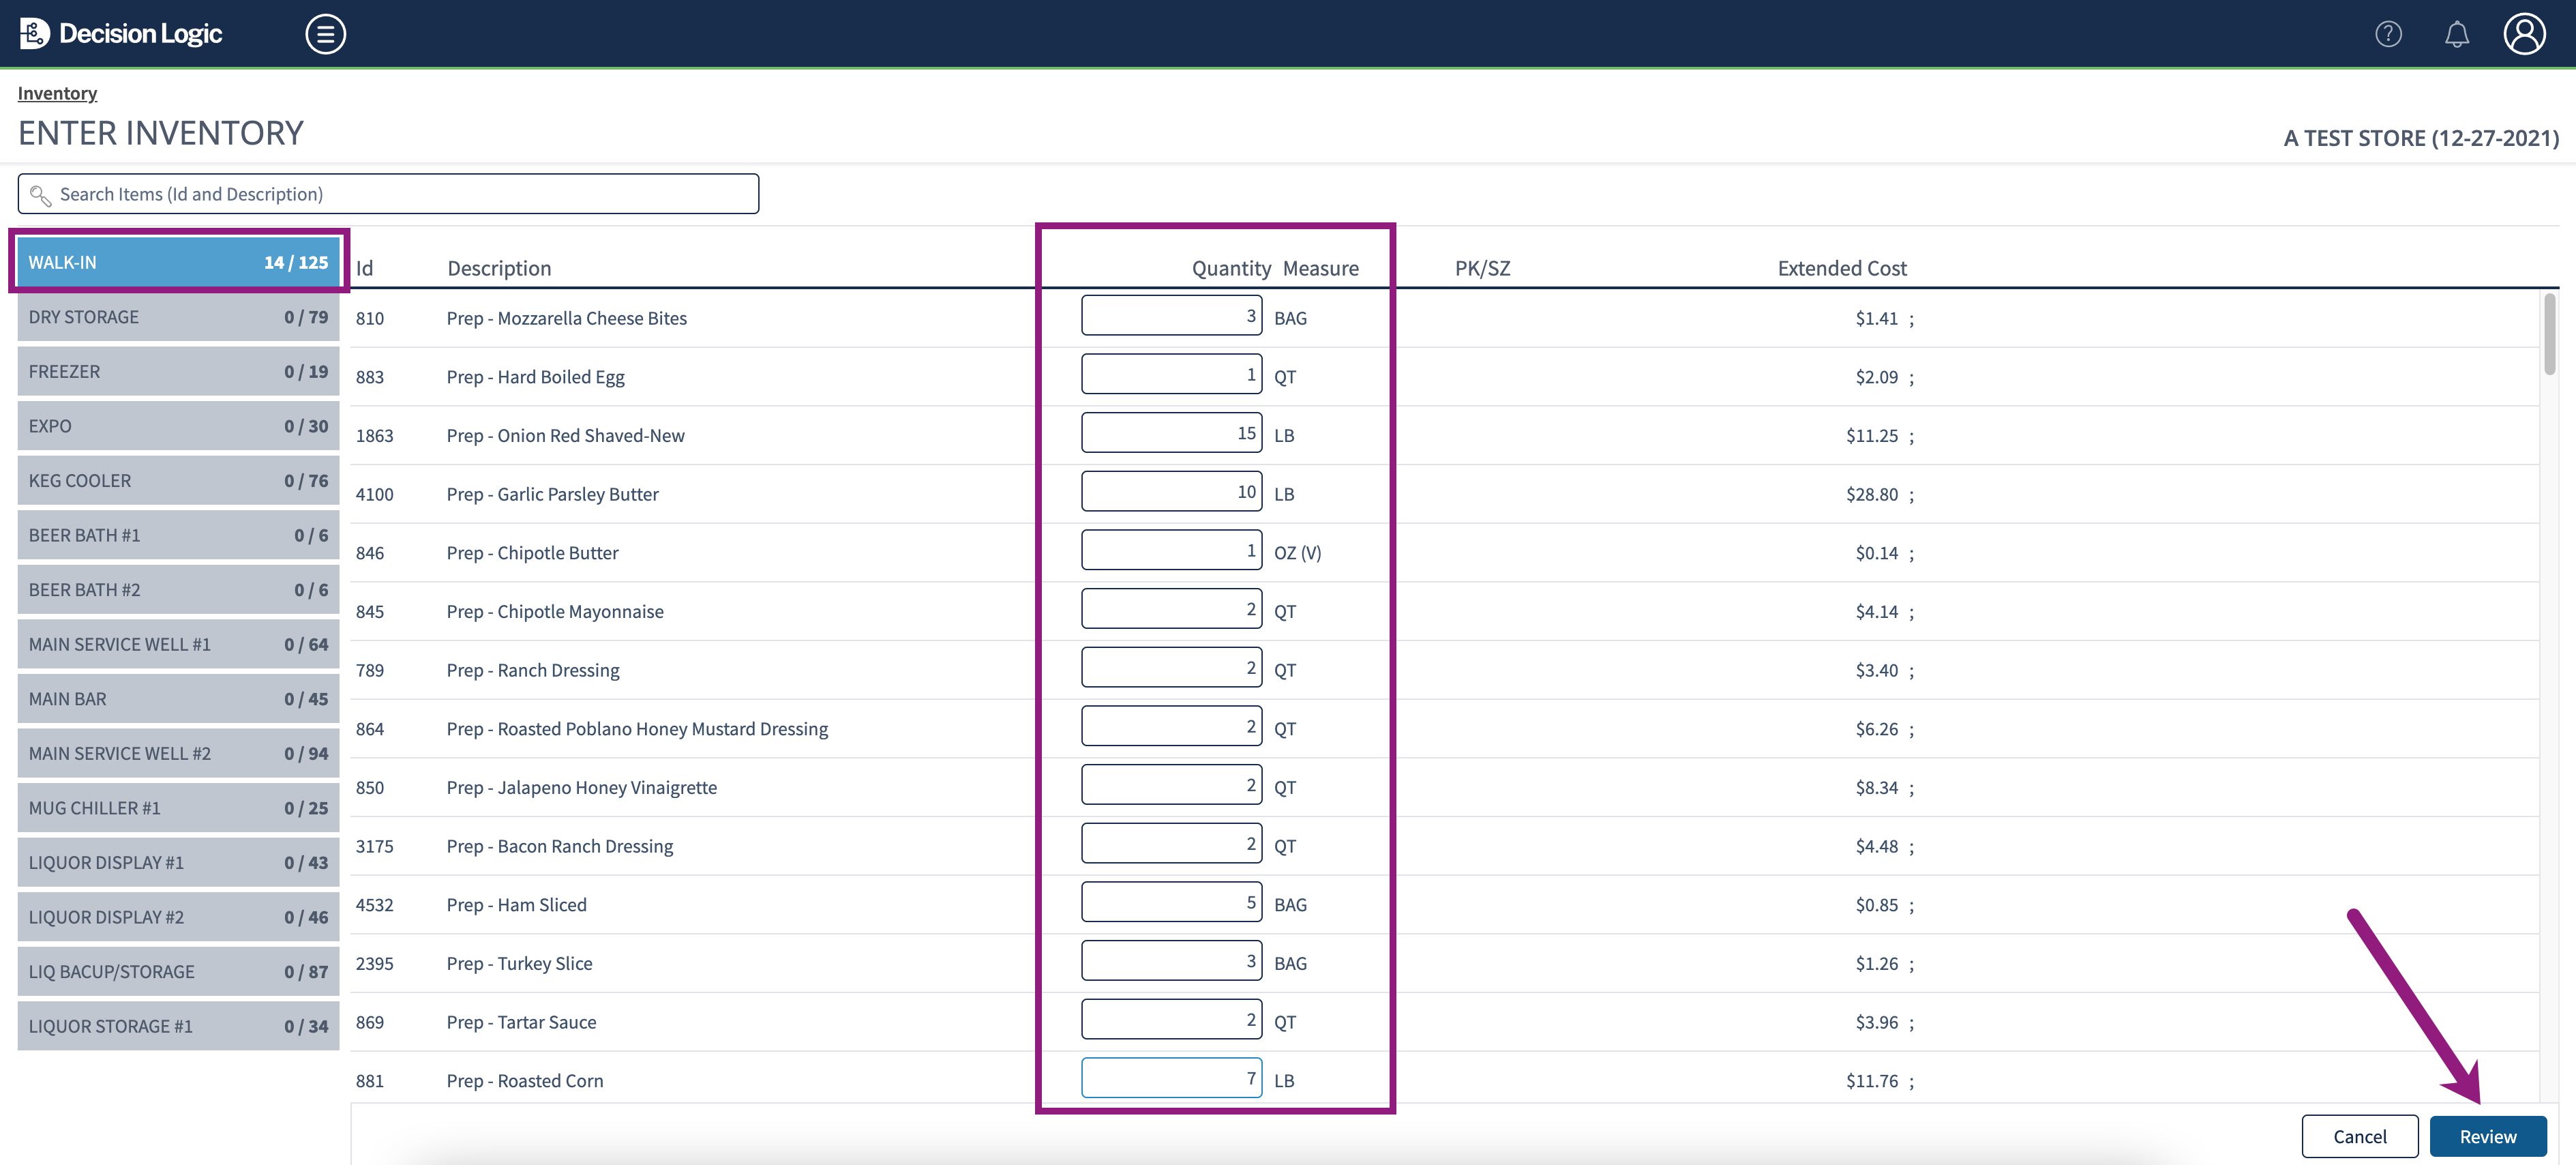
  7. Enter the Quantity for each Location.

  8. Click Review.

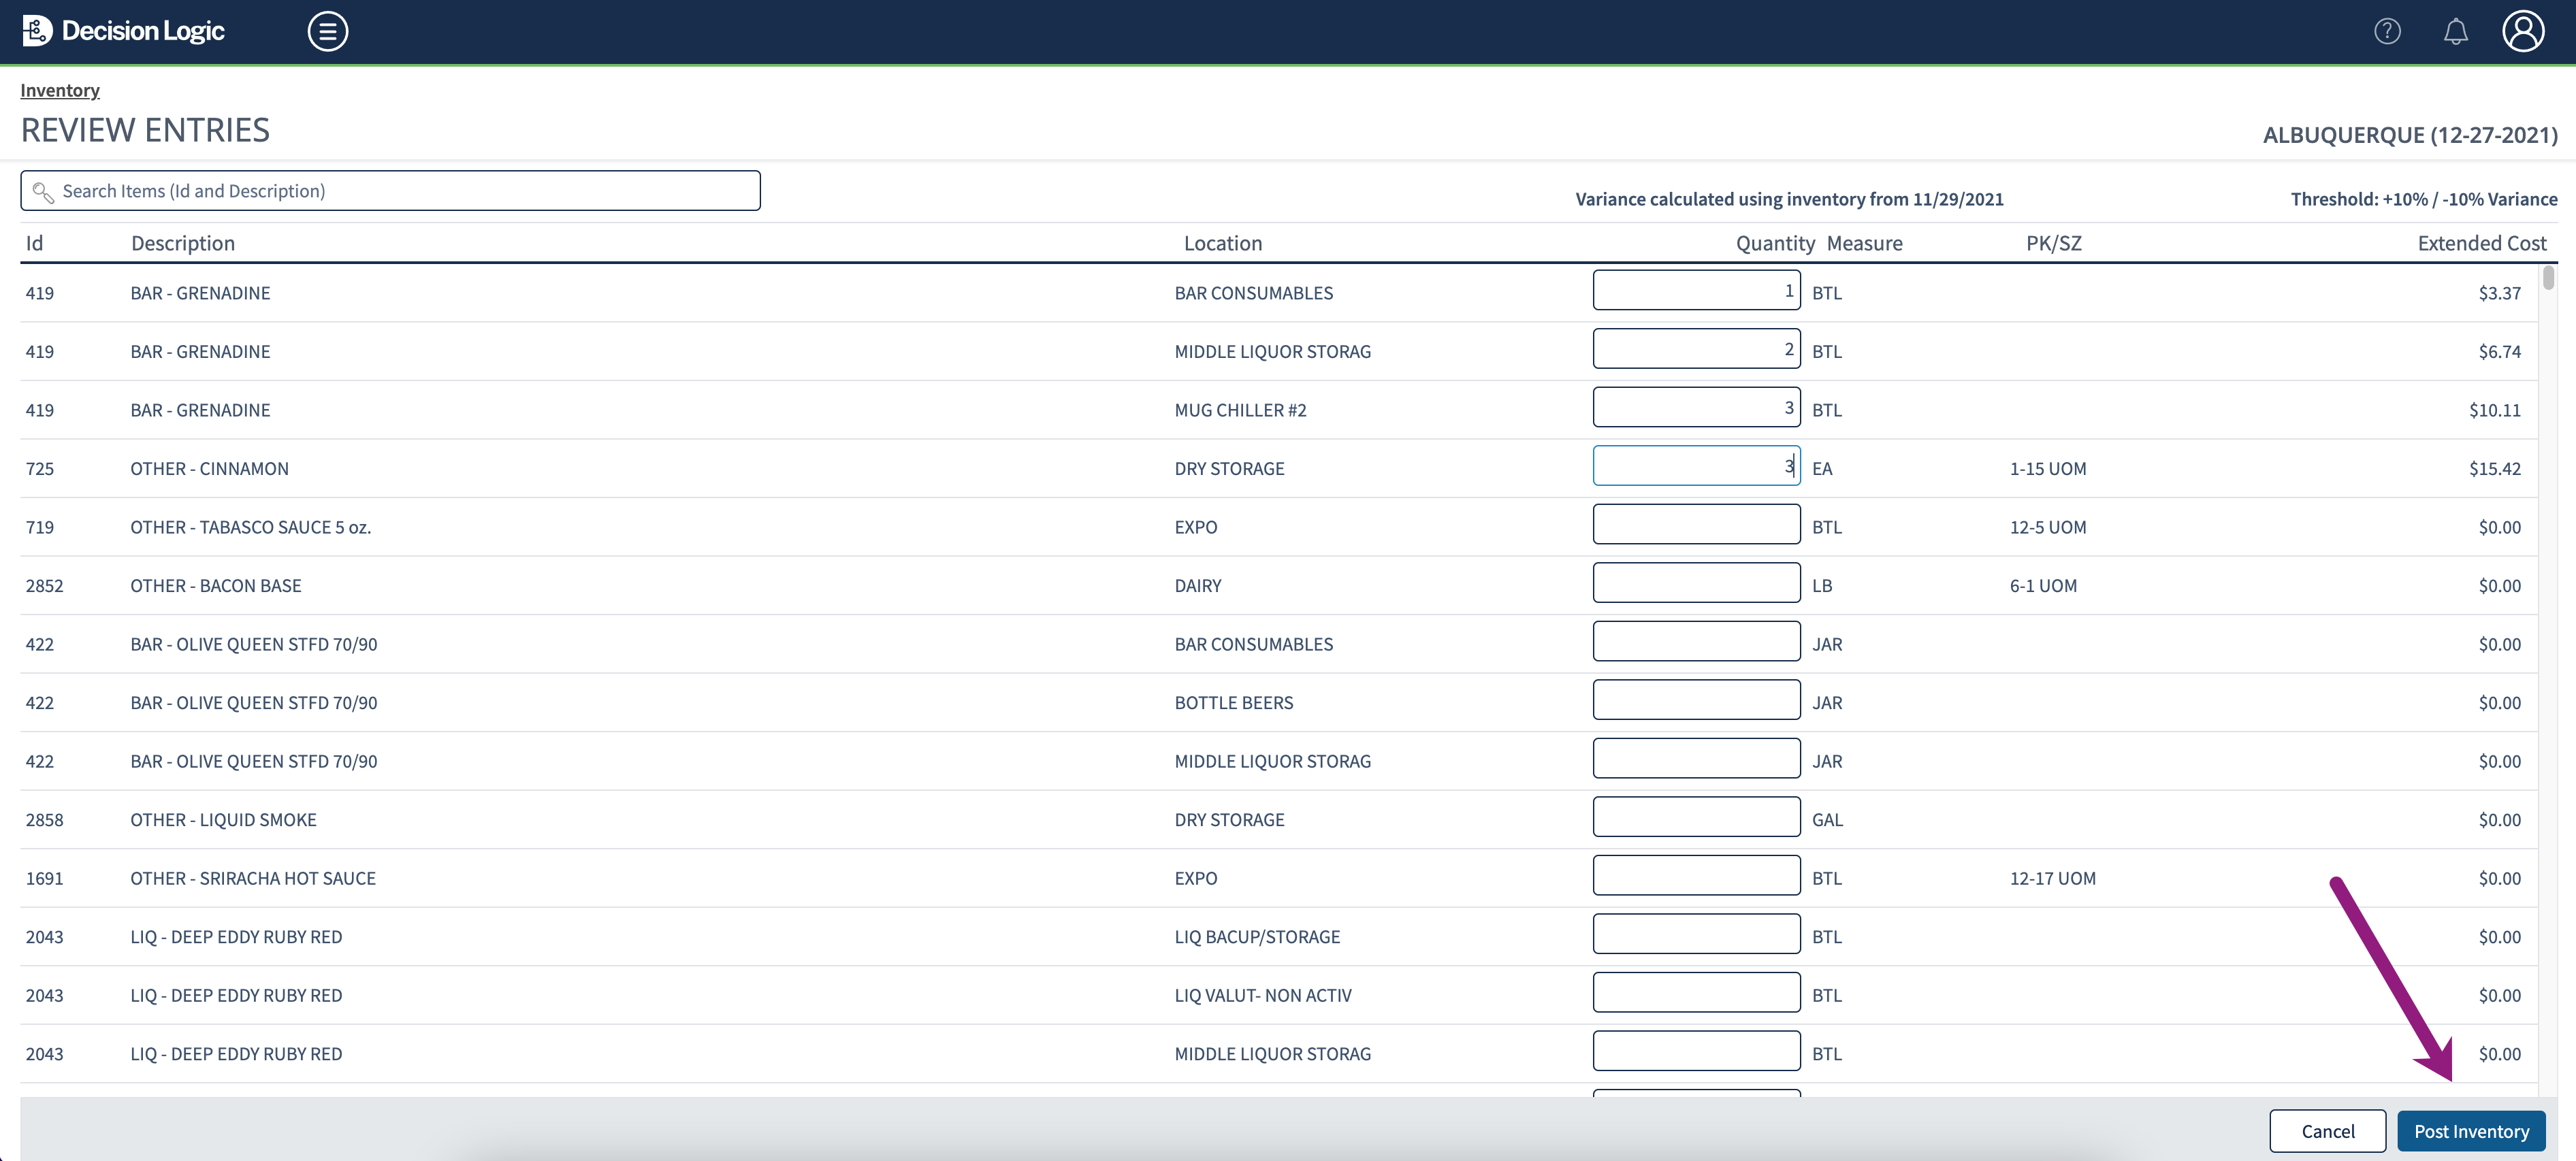
  9. Items with quantities outside of the defined variance threshold will appear. Review and click Post Inventory.

    1. Any count listed with a red ‘X’ has negative usage. For example, this may indicate a missed quantity, miskey, or an order not received correctly.

Info

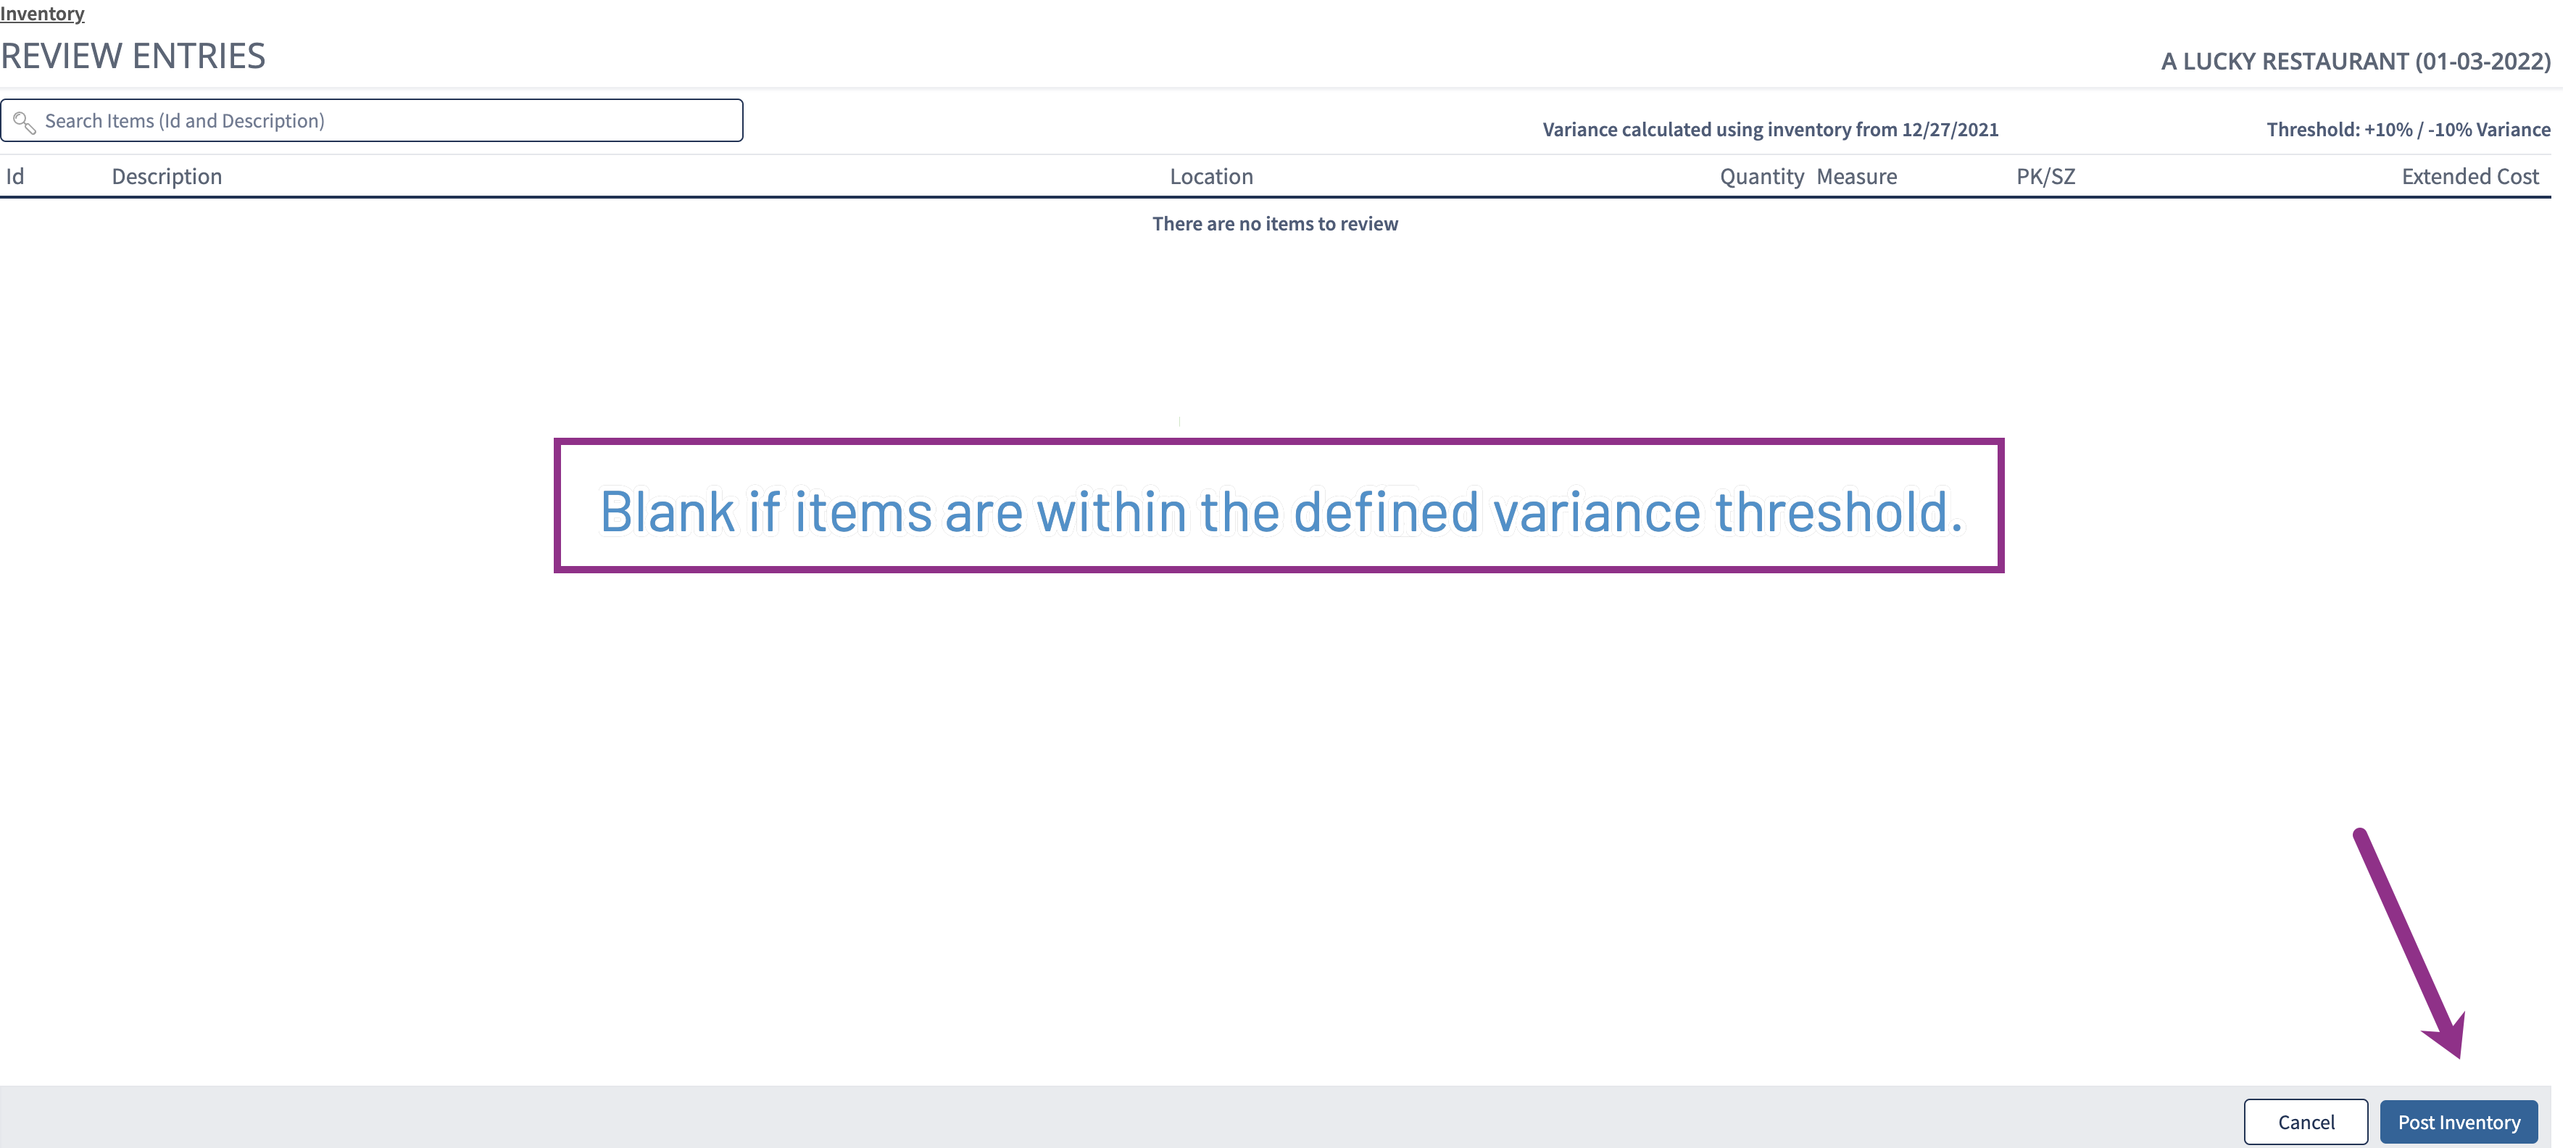
New stores entering their first inventory will have a blank review page.  Inventories moving forward will display only the items that fall outside of the defined variance threshold.  Variance on the review screen is determined based on the most recent inventory posted.

Example of blank review page when items are within the defined variance threshold.

Image RemovedImage Added

Users who have edit permission can make changes to posted inventories.  Users who do not have edit permissions will need to submit a Change Request to update a posted inventory.  Check out this article on how to submit a Change Request.

Calculations

Below are calculations configured when entering inventory through the Inventory Home page.

Metric

Formula

Extended Price Total

(Inventory Quantity / Inventory Multiplier) x last received bid file price

Actual Usage

Beginning Inventory + Orders Received - Ending Inventory