This page is for uploading templates for the Labor Scheduler to use. Depending on which template you choose, they contain time periods with minimum and maximum amounts of sales together with the number of hours that you assign to those sales ranges. Then, stores are assigned to the templates and the Labor Scheduler is populated using the template data.
Downloading the Labor Template
When using Labor Templates, the first thing to do is download the template that you want to work with.
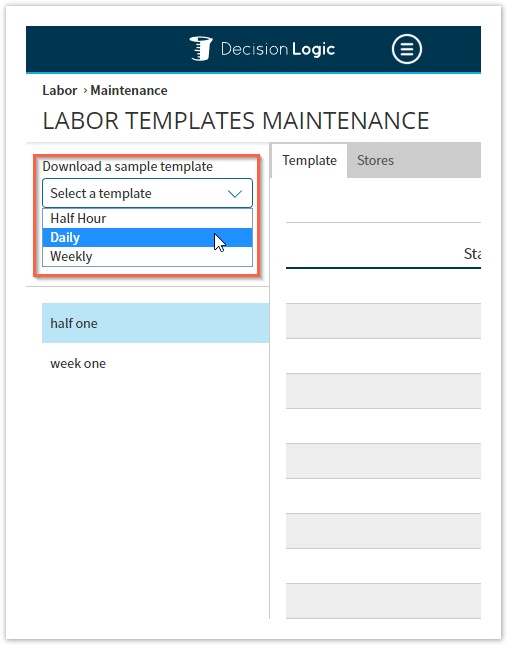
Navigate to Maintenance > Labor > Labor Templates and choosing a template from the template menu.
There are three choices, Half Hour, Daily, and Weekly.
Once you choose a template it will be downloaded automatically.
Filling out the Template
Once you have your template open, you can enter as many ranges of time as you need. Cells are pre-formatted.
Half-Hour
For the Half Hour template, enter data in the following columns:
- Start Half-Hour
- End Half-Hour
- Min $ Amount
- Max $ Amount
- Labor Hours
![]() If you need more than 150 rows of cells, please copy and paste from pre-formatted rows of cells.
If you need more than 150 rows of cells, please copy and paste from pre-formatted rows of cells.
For each line entry, you will want to use the Min $ amount that matches the previous Max $ Amount.
For example:
- If line 2 is: Min $ Amount $1000 - Max $ Amount $1500
- Then line 3 will be entered as Min $ Amount $1500 - Max $ Amount $2000
![]() Note, you will not want to have line two entered as Min $ Amount $1501 - Max $ Amount $2000
Note, you will not want to have line two entered as Min $ Amount $1501 - Max $ Amount $2000

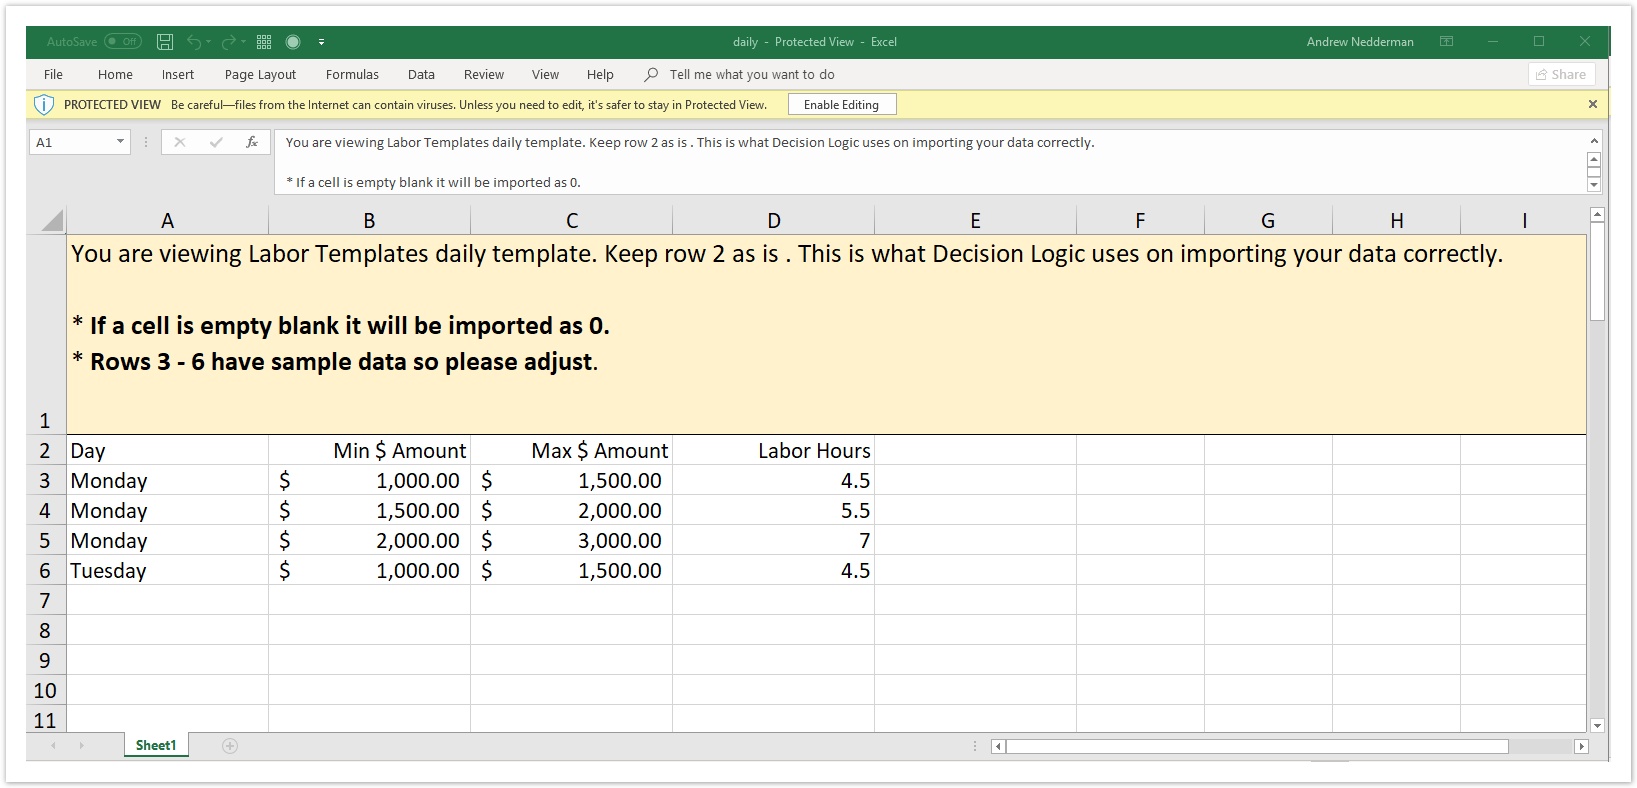
Daily
For the Daily template, enter data in the following columns:
- Day
- Min $ Amount
- Max $ Amount
- Labor Hours
![]() If you need more than 80 rows of cells, please copy and paste from pre-formatted rows of cells.
If you need more than 80 rows of cells, please copy and paste from pre-formatted rows of cells.
Weekly
For the Weekly template, enter data in the following columns:
- Min $ Amount
- Max $ Amount
- Labor Hours
![]() If you need more than 60 rows of cells, please copy and paste from pre-formatted rows of cells.
If you need more than 60 rows of cells, please copy and paste from pre-formatted rows of cells.

Uploading the Template
After you fill out the template, click the Add Template button on the Labor Templates page.
- Click the Choose File button, select your file from your computer.
- From the Template Type menu, choose the type of template. Half-Hour, Daily, or Weekly.
- Give your template a name. Choose something that is descriptive at a glance.
- Click the Validate button

On the next screen, review the data that you entered in the template.
Click the Next button.
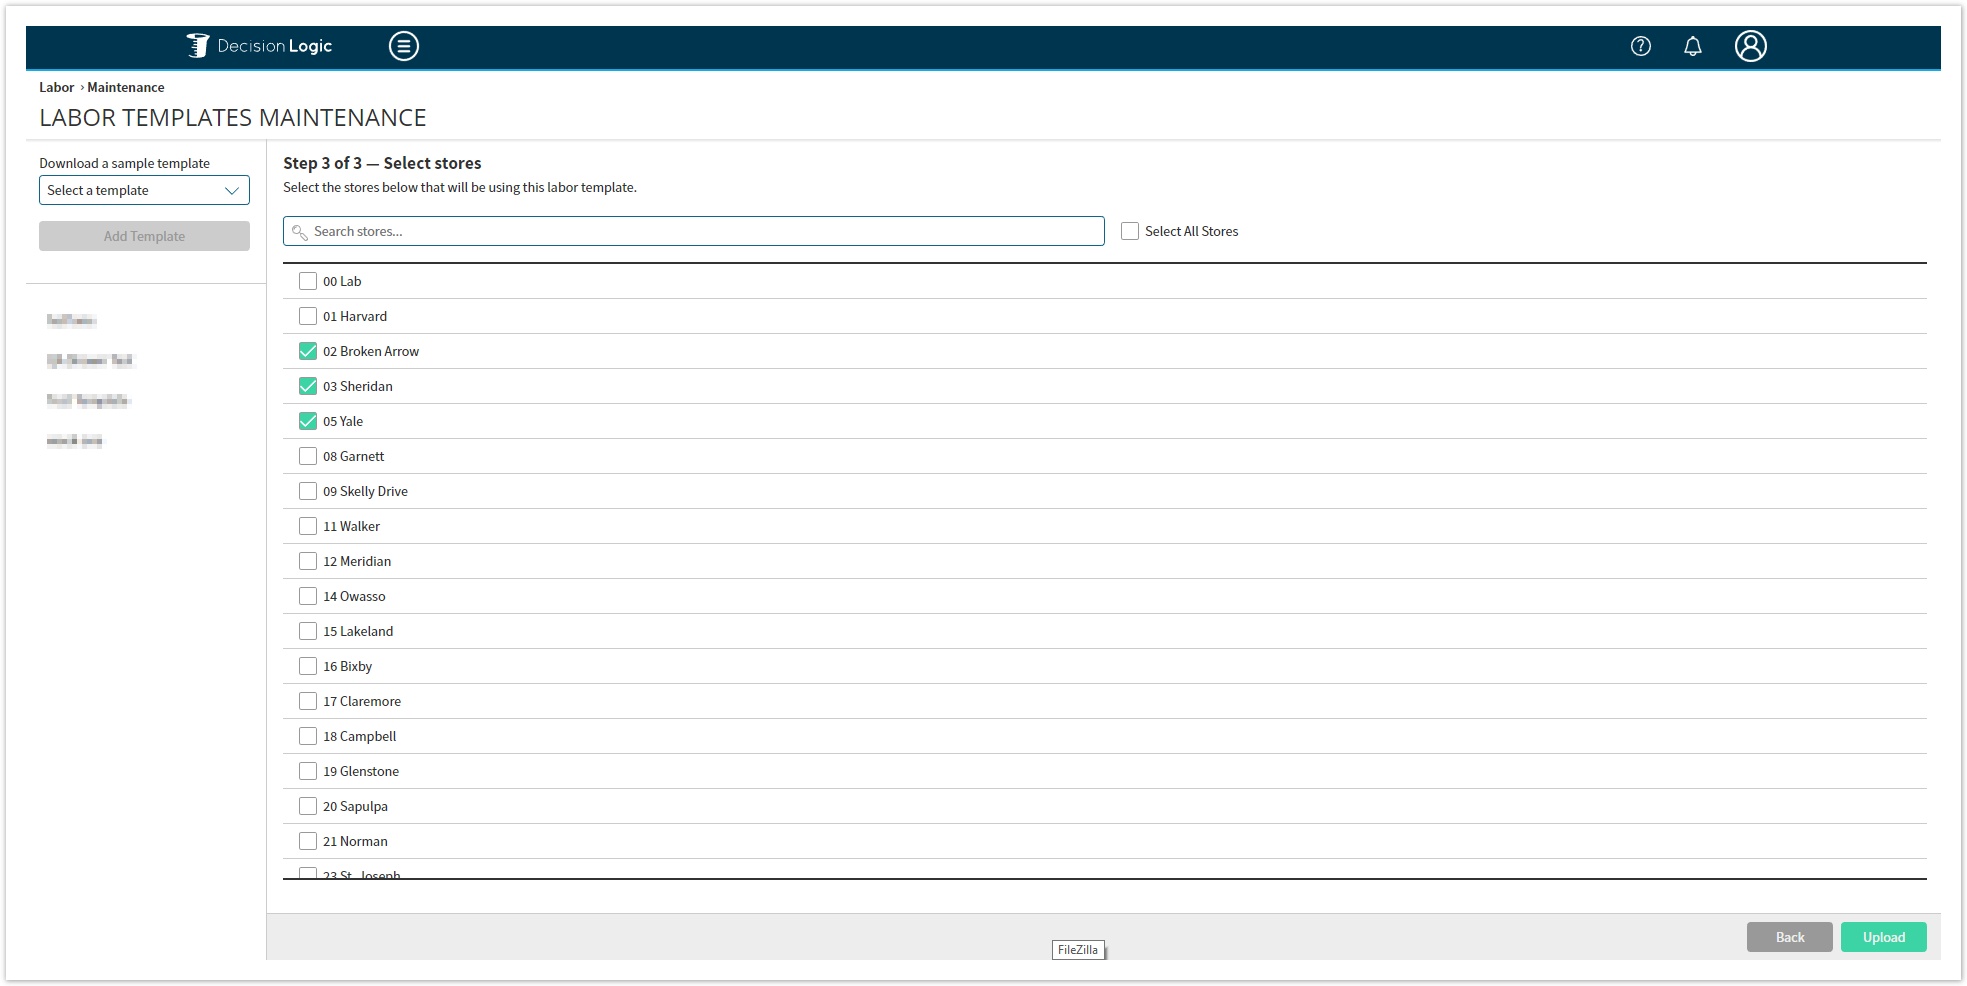
Choose the stores that should be assigned to your template.
Click the Upload button.
Edit a Template
To edit an existing template, download a new template or edit your original file.
Make sure that the template you want to edit is highlighted in blue on the left side of the screen.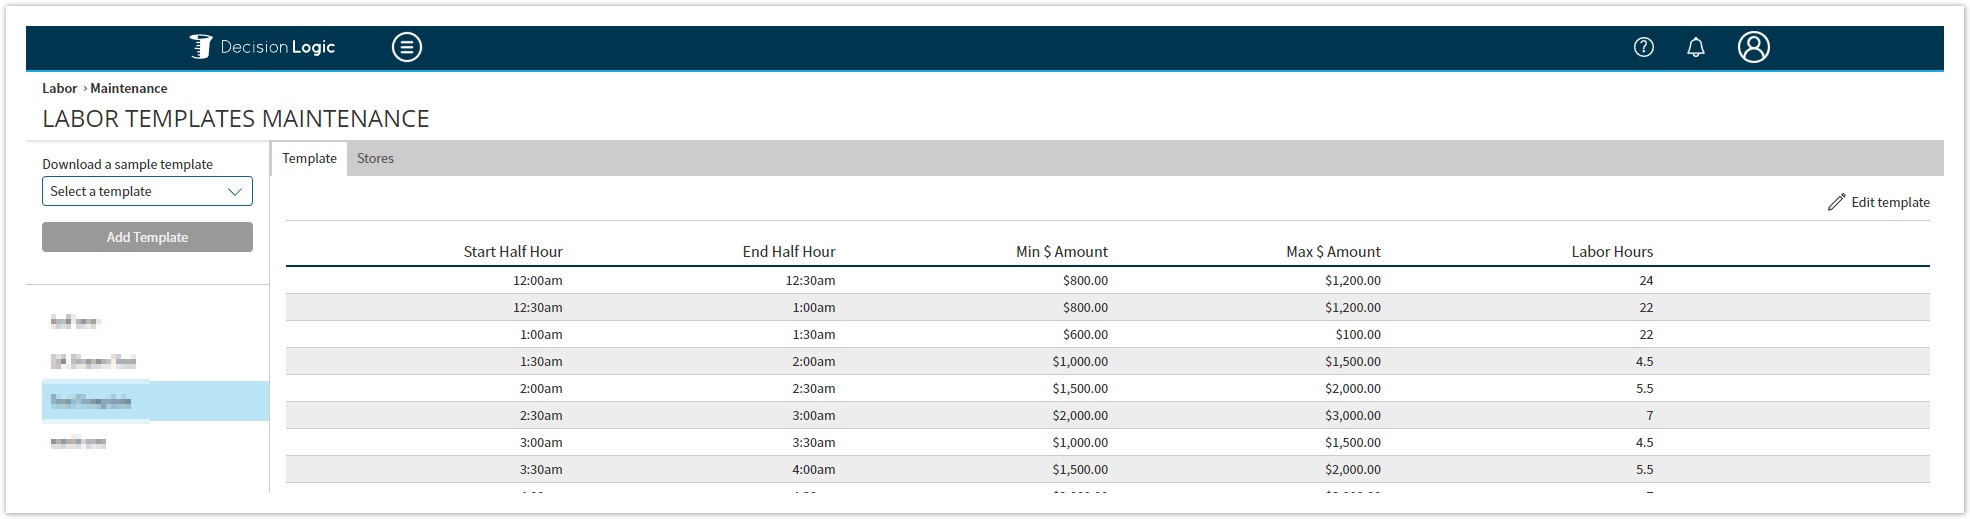
Click the Edit Template button.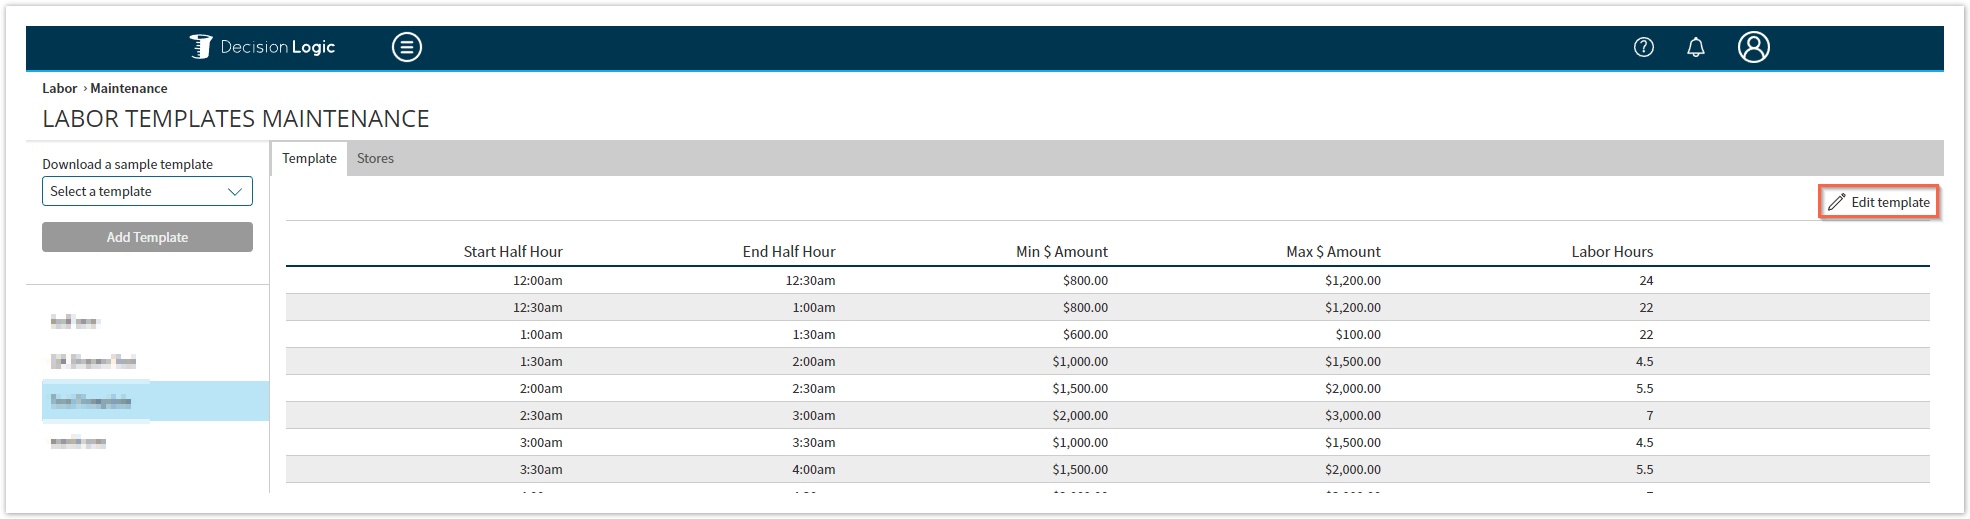
Click the Choose File button, select the file from your computer.
Click the Validate button.
On the next screen, review the data that you are editing.
Click the Update button.
![]() To get your Targeted hours reporting on the Labor Scheduler, the store must be assigned to a Labor Template.
To get your Targeted hours reporting on the Labor Scheduler, the store must be assigned to a Labor Template.
![]() If the template that a store is assigned to is deleted, then the location will lose Targeted Labor Hour reporting until they are reassigned to a new Labor Template.
If the template that a store is assigned to is deleted, then the location will lose Targeted Labor Hour reporting until they are reassigned to a new Labor Template.
Labor Template FAQ
On the template you specify the number of labor-hours you need for the segment. and Labor Scheduler> Daily schedule tells you how many shifts you should schedule for a segment.
For Example
The template says for the 7:00-7:30 segment if there are sales projected between $1 and $500, then schedule one labor-hour.
The forecasted sales for 5/13 are $128, so the daily schedule says you need to schedule 2 of the 30m shifts to equal
= 1 labor-hour.
If the forecasted sales were $750, it would instead tell you to schedule 4 of the 30m shifts
= 2 labor hours (per the specification for 7:00-7:30 and $500-$1000).
![]() It is important to note that if you are viewing 30-minute increments and you need 1 hour of labor, it would take two people to fulfill that with 2 shifts on the schedule.
It is important to note that if you are viewing 30-minute increments and you need 1 hour of labor, it would take two people to fulfill that with 2 shifts on the schedule.
Table of Contents
| Table of Contents |
|---|
For additional questions or assistance, please submit a support ticket by visiting our Decision Logic Help Center.