Creating Recipes
Click here to start creating a recipe

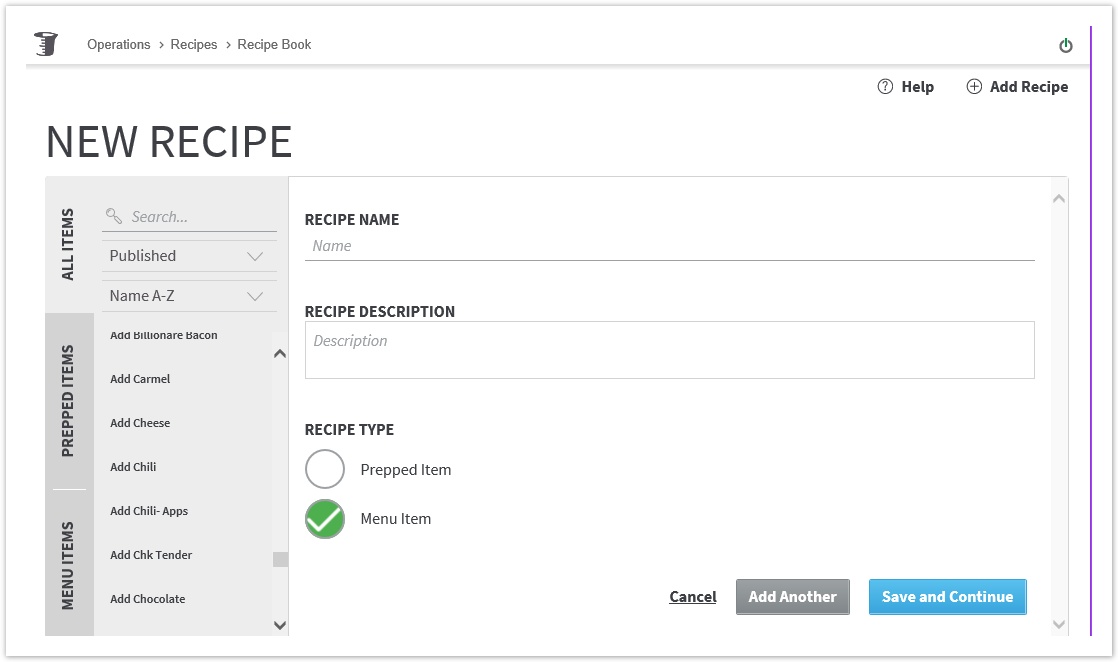
Enter the Recipe Name and Recipe Description.
- The recipe name should be a name your staff is familiar with and is commonly used in the restaurant.
- The description will be your restaurants' unique description or any important points of interest about the Menu Item.
- You will have the ability to add additional notes and steps later in the setup.
Select the type of recipe you are building under Recipe Type.
For prepped recipes select Prepped recipe type
For a full Menu Item select Menu Item recipe type
Select Save and Continue to build out the recipe
Select Add Another to continue adding recipe names and descriptions and revisit the recipes later.
Build Prepped Items
Most Menu Item recipes will call for use of prepped items. With Recipe Book you can create all your recipes in one place. Start creating prepped item recipes prior to creating Menu Items to save time when building out Menu Items.
- To begin creating a prepped recipe select the Prepped item option from the add recipe page to load the prepped item recipe form.
- Prepped recipe steps will be different than creating a Menu Item.
- You have the option of adding an Image for each recipe
- Enter all ingredients used to create the batch
- Enter the amount of each ingredient to be used
- Select the measurement type for each ingredient added
| Info | ||
|---|---|---|
| ||
Some prepped recipes will call for using a prepped item as an ingredient. Recipe Book allows you to use different measurement types to convert one measurement into another when logical. If choosing a new measurement type for a prepped ingredient pay attention to the original measurement type to ensure the qty of the new measurement is the correct amount of product going into your recipe. |
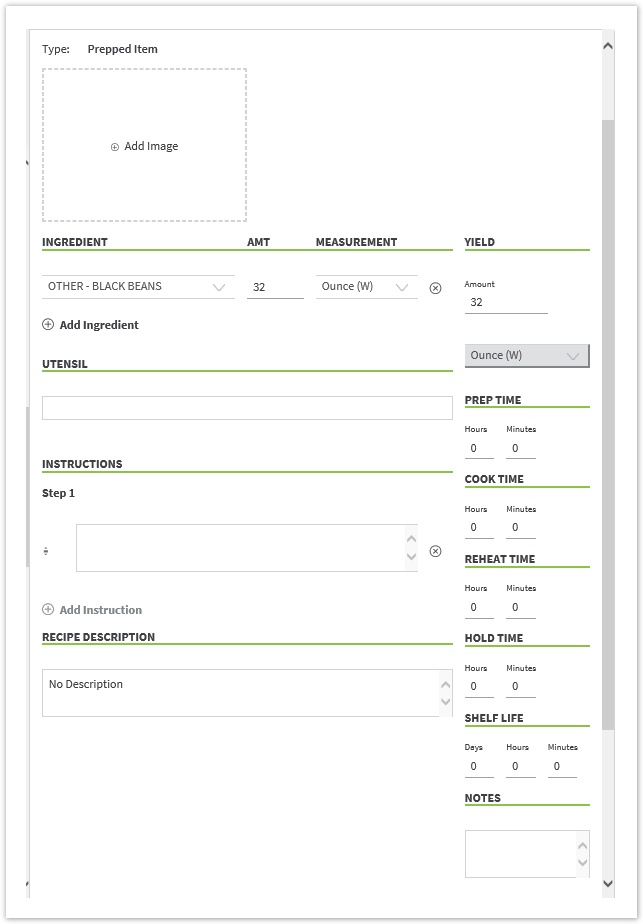
Table of Contents
| Table of Contents | ||
|---|---|---|
|
Add ingredients
- To add ingredients select the ingredient drop-down option.
- Scroll, or search, to see a list of results.
- Select the ingredient to add.

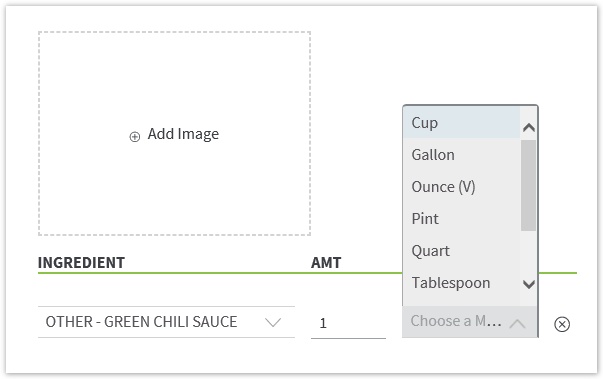
Select Measures
- Once the ingredient is selected you will have the option to select a measurement type.
- Once a measurement is selected, enter the amount to be used in the AMT field.
Remove Ingredients
- To remove an ingredient form from the recipe select the X next to the ingredient you wish to remove.

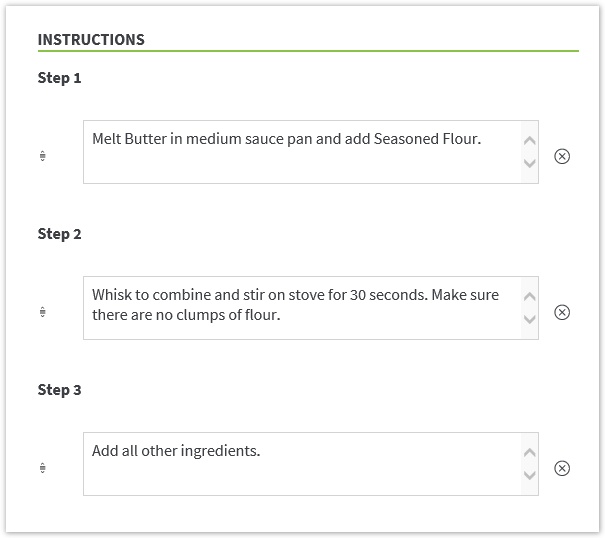
Add instructions
- Select the text box to start adding instructions.
- Enter instructions for the first step of the recipe by typing in the text box.
- Add additional steps by selecting + Add Instruction

- Continue to add more instructions until all recipe steps have been entered.
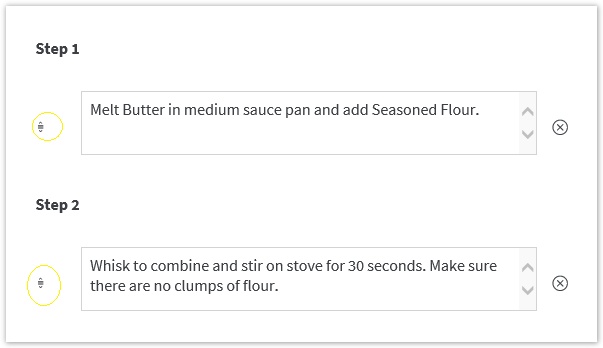
Change the order of instructions
- Change the order of instructions by using the arrows to drag and drop steps.
Remove Instructions
- Use the X to remove a step from the list of instructions.
Add utensils
- To add utensils to the recipe select the utensils text box.
- A drop-down list of available utensils will appear.
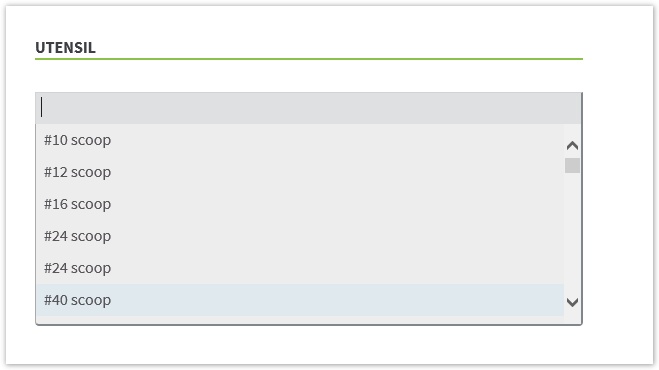
- Scroll or Begin begin typing the utensil of choice and select from the drop-down to add the utensil to the recipe.
- Repeat the process to add additional utensils.

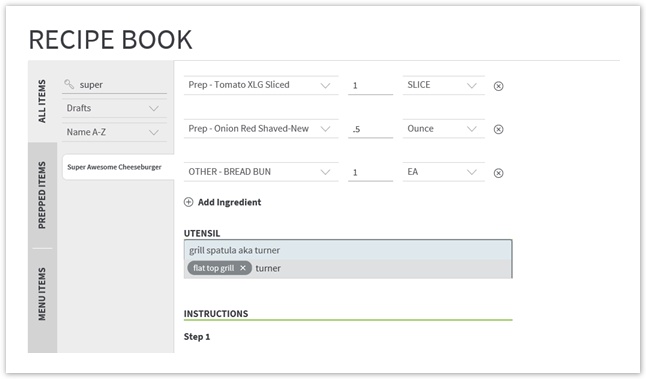
Remove Utensils
- To remove a utensil, select the utensil you wish to remove and select the X.
- You can also place your cursor behind the utensil you wish to remove and use the backspace key to delete it.
Publish and Integrate Prepped Item
- Once you have completed the recipe you can select Publish and Setup Integration option.
- The prepped item integration page will give you the option to change the measurement type used when adding a prepped item as an ingredient in other recipes.

Prepped Inventory Measures
- Define the inventory measure by selecting a measure from the drop-down.
- Inventory Measures determine how the prepped item is counted on your inventory sets.
- The options will be consistent with recipe measure conversions.
Prepped Recipe Measures
- Define a measurement to be used when adding a prepped recipe as an ingredient select a recipe measure that converts into the yield measure.
Example:
Yield = Oz(v)
Recipe Measure = Oz(v)
Inv Measure = Quart
Prepped Recipe Multiplier
- The recipe multiplier will be the correct amount of recipe units based on the measure selected that exist in 1 inventoried unit.
Example:
Inventory Measure = Gallon
Recipe Measure = Oz(v) Recipe Multiplier = 128
Build Menu Item Recipes
- Once you have all your Prepped Items into Recipe Book, you are ready to create the Menu Item recipes.
- If you don't have all the prepped items needed, you can always save a draft of the Menu Item recipe and come back to it later after you added the prepped item.
- In the Menu Item recipe form, you can add an image, add ingredients with amounts and measurements, add utensils used when preparing the recipe, and list step-by-step instructions.
- Start by Selecting Menu Item as the recipe type.
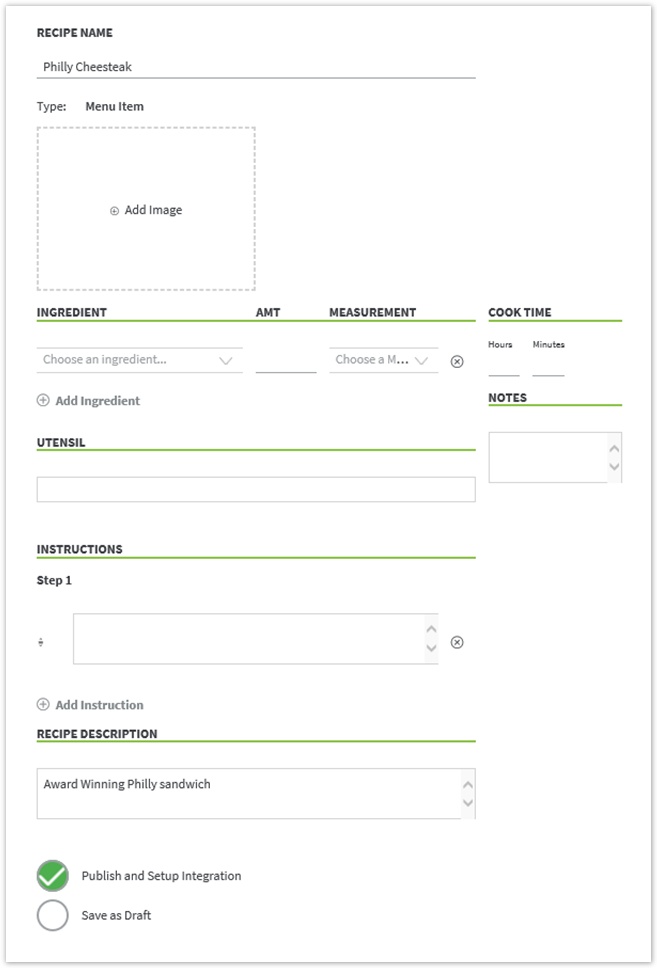
Add Cook Time
- Enter hours and Minutes required to complete the recipe under Cook Time
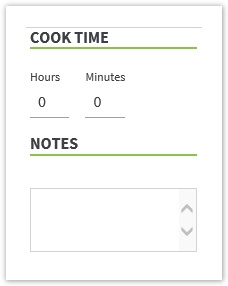
Add Notes
- Notes can be added for any specifics or important notices not covered in the instruction.
- Add notes by typing in the notes text box.

Save Drafts
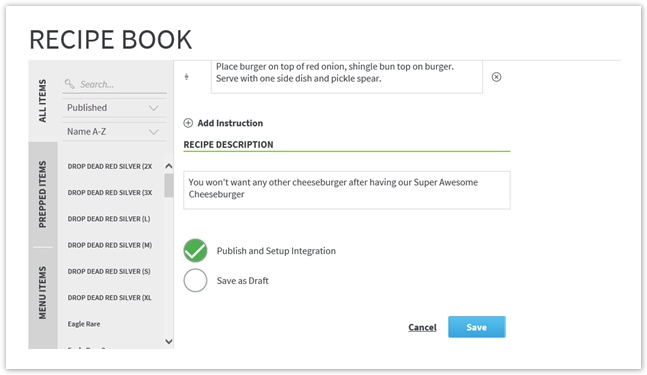
- After completing the recipe you can save the recipe as Draft to visit later or Publish and Set Up integration to go live with the recipe.
- When making changes to a recipe before going live you have the option to save changes as a draft.
- Recipe Book allows one draft version to be saved per recipe.
- To save the recipe as a draft place a check mark checkmark next to Save as Draft and select Save.
- If a recipe has a draft on it, this means there are pending changes to it that have not been published to the rest of the system.
- The View page will show the Published version. The Edit page will display the Draft version if one exists.
- Also on the view page, you will see "Preview Draft" which indicates it has a draft.

- A success notice will appear when the draft is saved and the status of the recipe will be listed as Draft.

Search your Recipe Drafts
- Change the search filter to Drafts to see a list of all drafts

Edit Recipe Drafts
- To make edits to a prepped item or Menu Item draft select Edit from the top right of the recipe form.

Publish Recipes
- Once a recipe is complete, make the recipe available to all users by selecting Publish and Set UP integration.
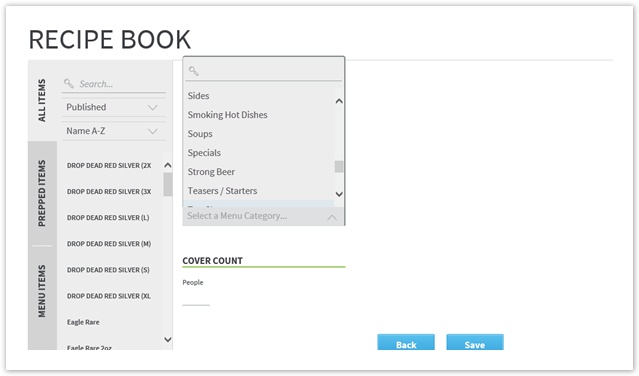
Choose Menu Category for the recipe
- To set up the integration start by selecting a menu category for the recipe.
- This will determine which category the Menu Item will report in Decision Logic on Menu Mix reports.
Add a new Menu Category
- Navigate to Maintenance> Product> Menu Maintenance> select any menu item>
- select Manage Categories (page zoom needs to be 100% or lower)> select +Menu Category
Once it has been added, you can then go back into Recipe Book and it will be active for use.
Defining cover count
- For clients configured to track guest count in Decision Logic by cover count define a cover count for the Menu Item.
- The cover count should reflect the number of guests intended to be served by this item.
- This field is optional for clients not configured to track guests by cover count.
![]() For questions on these options contact helpdesk@decisionlogic.co
For questions on these options contact helpdesk@decisionlogic.co

Deactivate/activate item
- When recipes are no longer in use, you will want to use the toggle to activate or deactivate an item

Add Images
- To add an image of your recipe from your computer select
 .
. - Browse to the location of the image in your computer.
- Select the image to add from your computer. Images must be less than 1.25MB
- Select one image file to upload.
- Select Open to add the image to the recipe.
![]()
- The image will appear on the recipe book form after uploading
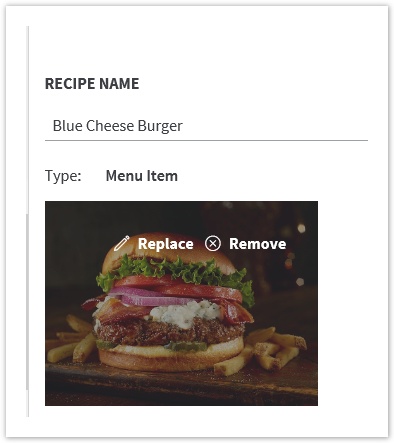
To Remove or Replace Image
- To remove or replace an image select Edit on an existing recipe.
- This will activate the Replace or Remove options directly on the image.
Replace Image
- To Replace and an image select Edit on the recipe then select Replace on the image.
- Selecting replace will open your computer's directory.
- Search for and select the image you wish to upload.
- Select one image file to upload.
- Select Open to add the image to the recipe.
![]()
Remove Image
- To remove an existing image select Edit on an existing recipe.
Print Recipes
- To print a recipe, click the Print button while viewing the recipe you wish to print.

- A PDF with the item name will be downloaded from your browser.
- Click on the file or open it from your computer to view it in your browser.
- Print or save the file from there.
Mapping Recipe Book Menu Items
Once you have created a new menu item in Recipe Book, you will want to map them in Menu Maintenance:
Navigate to Maintenance > Product > Menu Maintenance > search for the menu name > select it > go to the Menu Sets tab to enter the POS ID and Price > Save
This will enable Menu Mix reporting and Plate Cost.
FAQ Recipe Book
You want to change the recipe measure on an ingredient for a current menu item:
Scenario One
If you are changing the ingredient Recipe Measure in Ingredient Management:
- Then you will want to collect a list of Recipes to update.
- This can be done in Recipe Export, or in Ingredient Management> See Recipes.
- Then remove the ingredient from menu items, and publish them
- Last you will want to go back to those menu items and add the ingredient back.
- When adding it back you will see the new measure.
Scenario 2
You are not changing the ingredient Recipe Measure, but you want to be able to add the ingredient with old and new recipe measure.
- You will want to create a prepped item that uses the new measure OZ (w) as the Yield
- You will then be able to use that prepped item in the recipe with that new measure.
- With this option, you can use the ingredient both ways with OZ(v) with the raw ingredient and you can also use OZ (w) with the prepped item.