This article shows users how to enter and edit vendor-related information for accounting purposes.
Overview
PPC stands for Portable Purchase Capture. This page is used to create accounting categories to help track expenses for the Budget (P&L) to manage costs. This allows businesses to utilize invoice functions in Decision Logic for accounting and accounting export purposes please set up the following options.
Navigate to Maintenance > General > PPC Maintenance
Create Vendor
Create vendors to utilize invoicing features for accounting and accounting exports. These will also be a required map to for distributors in order to tie electronic invoices to orders placed in Decision Logic.
See the related topic on Maintenance > Distributors
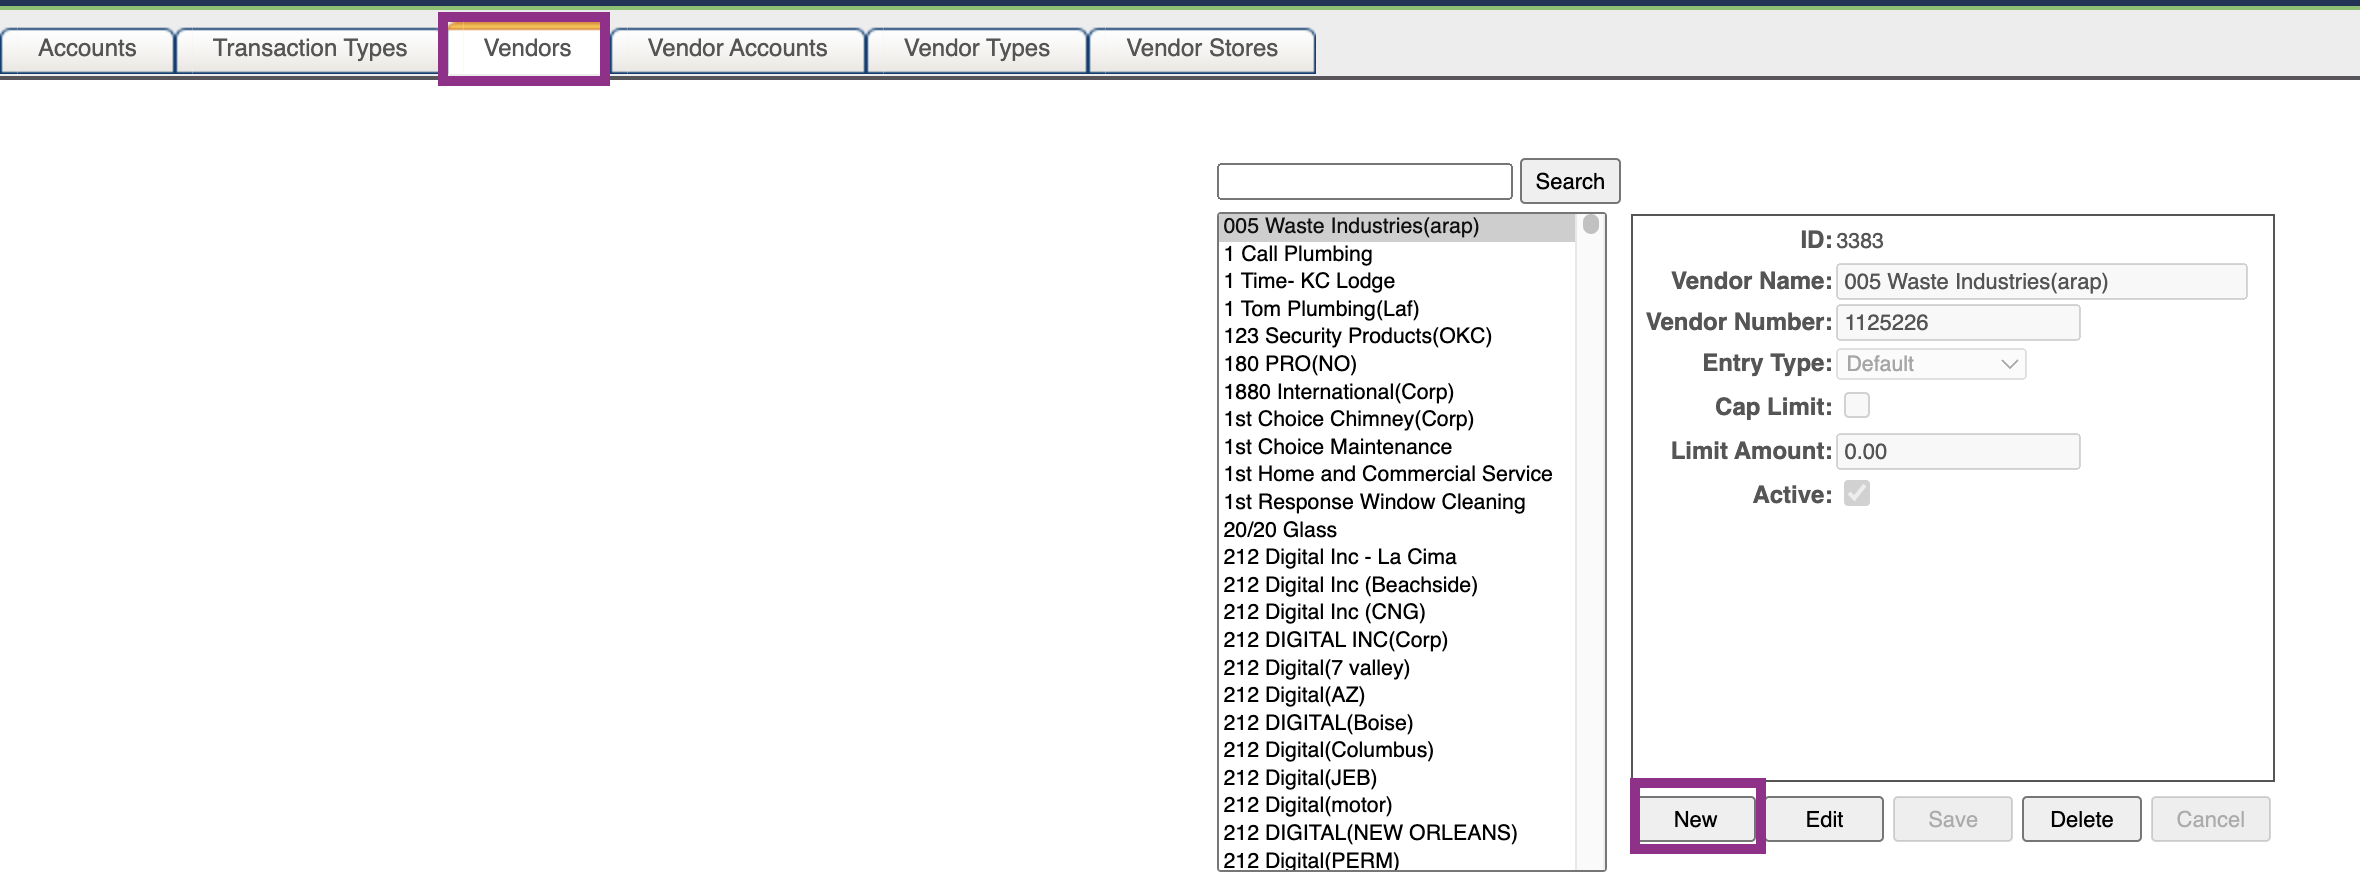
Select Vendors tabBegin by navigating to:
Maintenance > General > PPC Maintenance
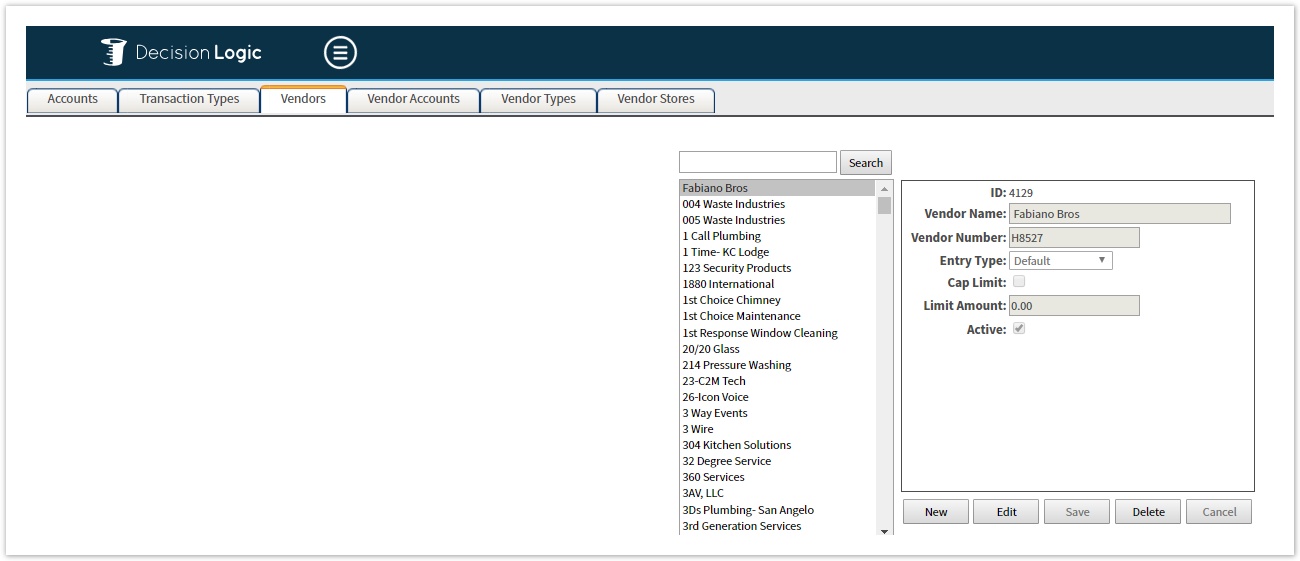
Select the Vendors tab.
Select New.
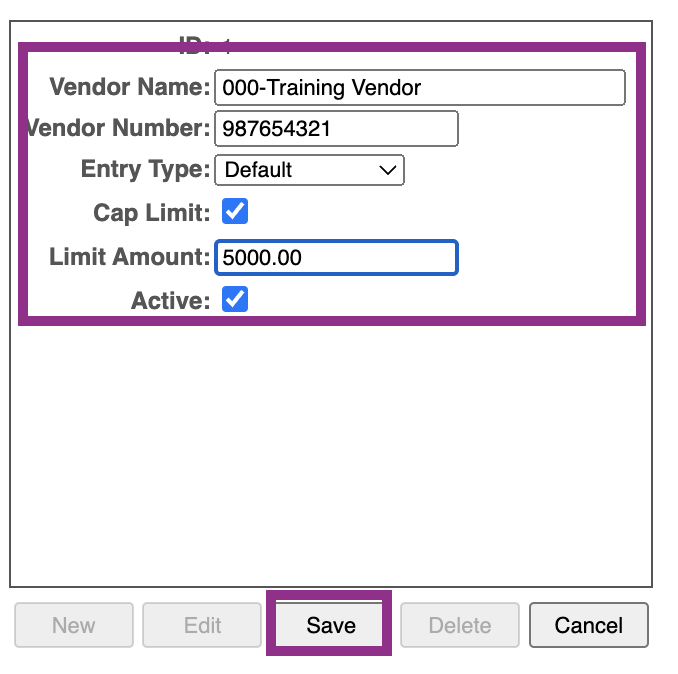
Enter the Vendor Name.
Enter the Vendor Number.
This is the account number for the vendor accounting package is expecting.
Select Entry Type,
Default standard invoice entry.
Corporate Only.
Split Entry Only: Apply an invoice to multiple stores for the same invoice number.
This will remove that vendor from the Invoice Entry vendor list and add it to the Split Entry Only vendor list.
If you receive an invoice from
a vendor
with only
one location, you
will still enter it via the Split Entry Only page.
Check
the box Cap Limit.
Enter the cap Limit Amount.
This limits the dollar amount of invoices that can be entered for this vendor.
Check
the box Active.
Save.
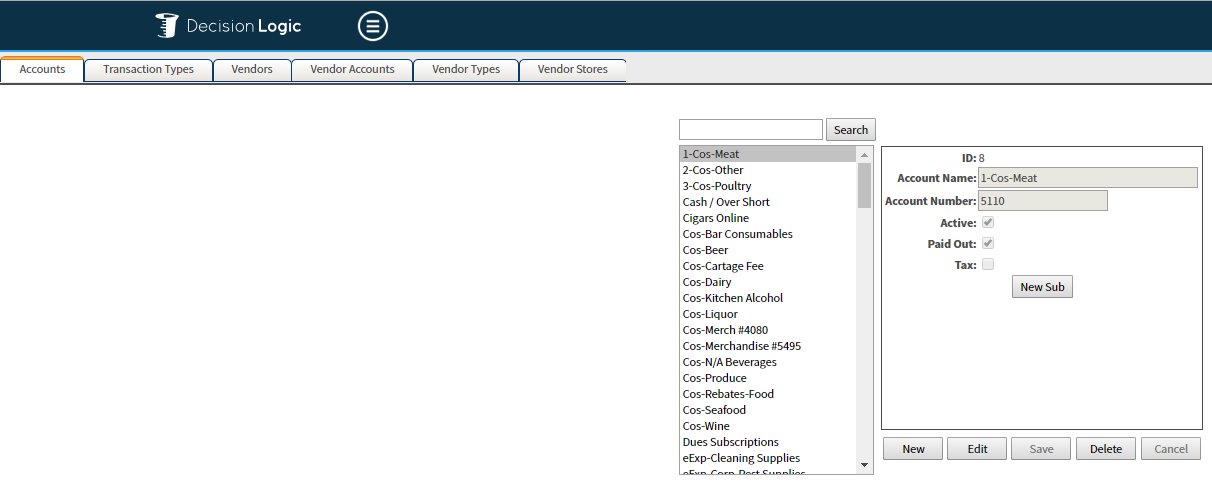
Accounts
Select New to create and enter Account Name for the type of accounts each vendor will use.
Define the Account Number as used in your accounting package.
Check Active.
Paid In and Paid Out
Check this box if the account is used for both Paid Outs and Paid Ins
Accounts set up as Paid outs can be
pullpulled Paid Outs and Paid Ins from your POS system. Submit a support ticket using our Customer Support Portal to see if a task exists for Paid Out import with your Point of Sale.
| Info |
|---|
Once the task has been enabled by Decision Logic, |
you will want to enter the Account in PPC Maintenance and then map the POS ID in POS Admin. |
Paid outs can also be entered manually on EOD.
Enabling Tax for Orders and Invoices
see See Manual Receive with Tax
Decision Logic supports a single Tax account. Do not flag multiple accounts as Tax.
Taxes will come over on the item level detail for E-Invoices.
- For setting
Set up Manual Distributors in Distributors
see Note this does not calculate tax
,but rather gives you the option to enter tax during the Manual Receive
processprocess.
Navigate to to PPC Maintenance > Create Sales Tax as an Account
Create a New Account
nameName: Tax
Check the Tax box.
Enter the Account number if needed for Accounting exports.

Assign Sales Tax
AccountAccounts to Vendors
Navigate to to PPC Maintenance > Vendor Accounts
Assign a Sales Tax account to all vendors needing to track Sales Tax.
| Info |
|---|
Currently, |
Decision Logic only supports 1 tax account per vendor. |
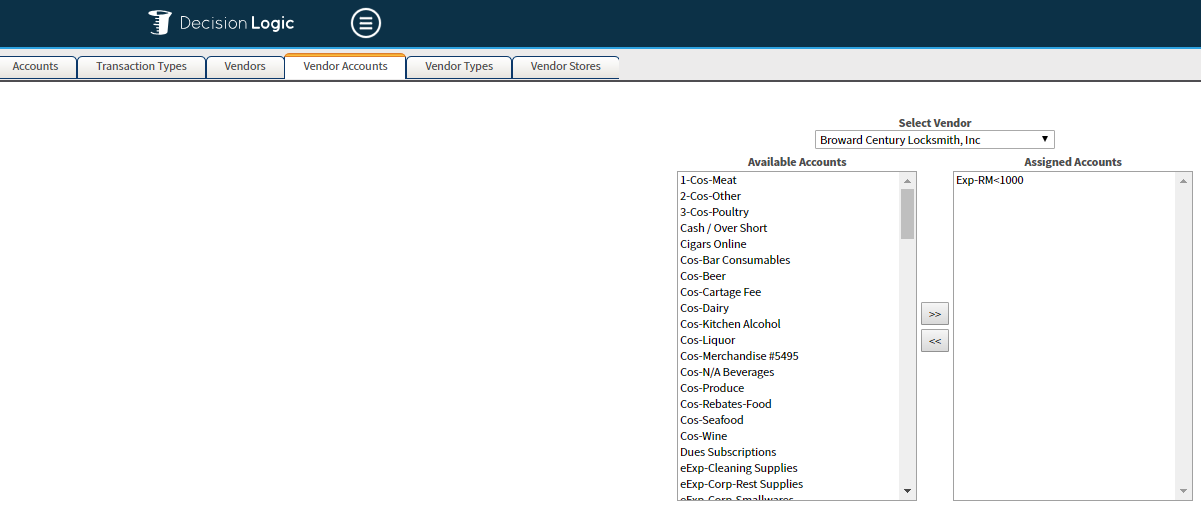


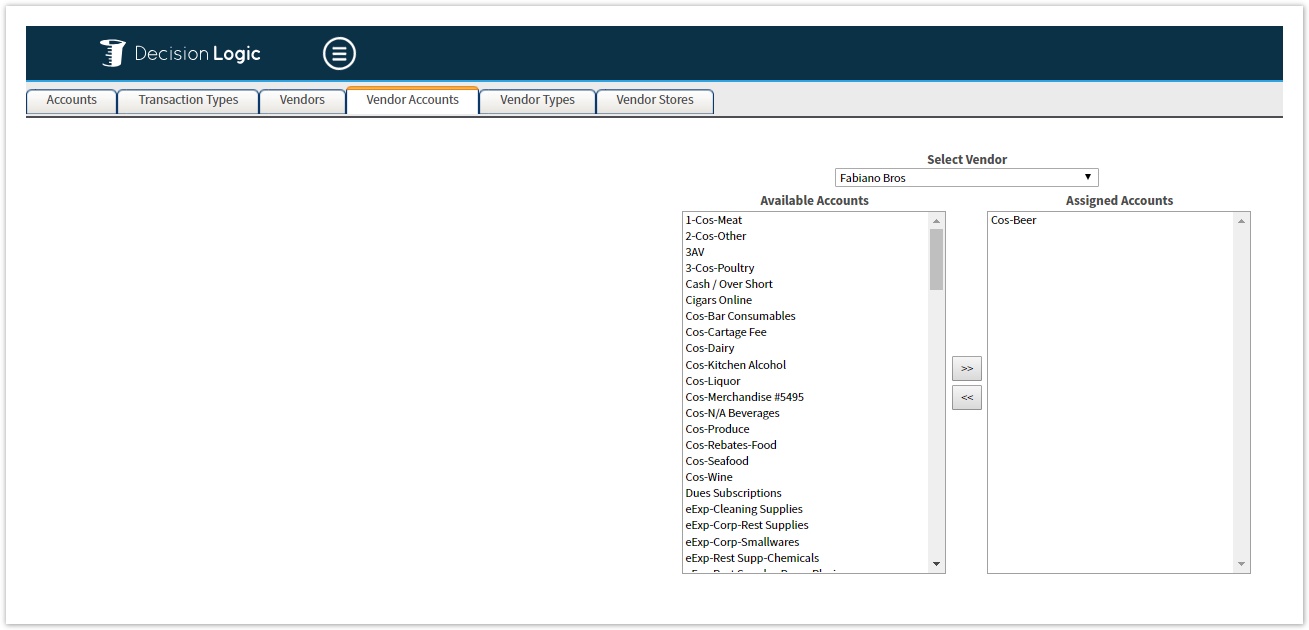
Vendor Account Assignment
Select a Vendor from the drop-down list.
Select the type of account each vendor can write to from the left pane of Available Accounts one at a time and use the >> “>>” to assign the account.
Once an account has been assigned to the vendor it will display in the right pane under Assigned Accounts.
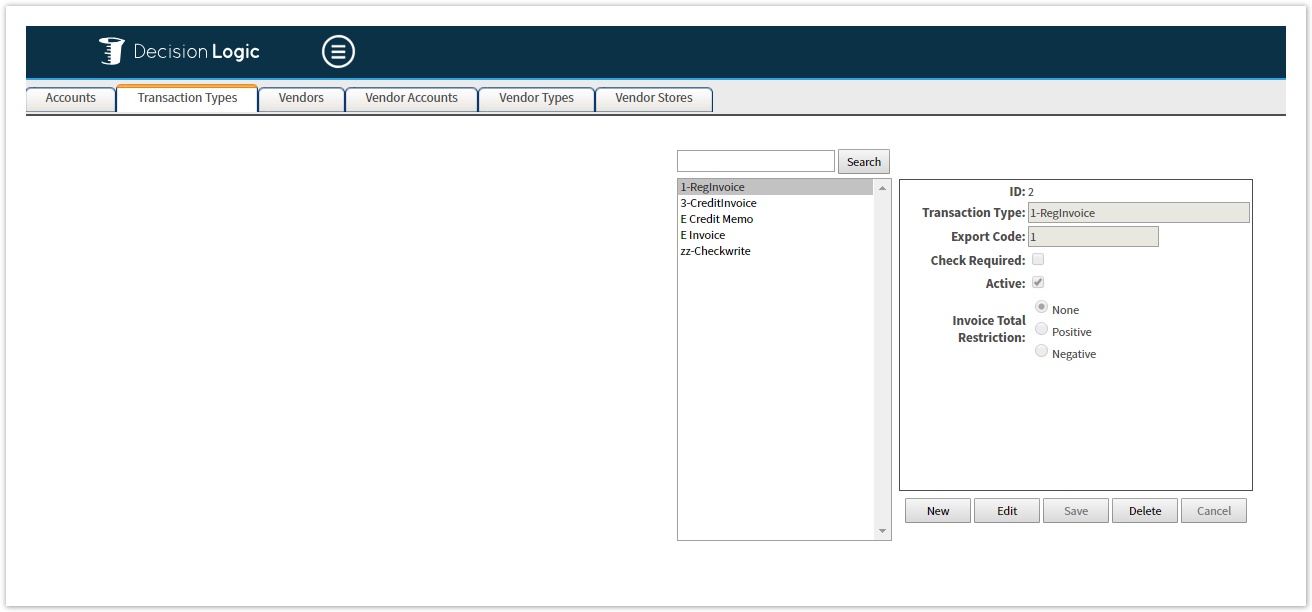
Vendor Transaction Types
To create, Edit, or Delete Transaction Types for each vendor, you will want to take the following steps:
Select New.
Enter Transaction Type name or description.
Enter the Export code from your accounting package.
Define Check Required where applicable.
For use for example, on Beer or Liquor vendors or where payment is required upon delivery and an AP or Fintech system is not in place.
Check number can then be entered on the manual receive page.
Mark as Active.
Define Invoice Total Restriction
None
Positive
Negative

Vendor Types
Select a Vendor from the drop-down list.
Select the transaction - type each vendor will use from the left pane of Available Types one at a time and use the > “>” to assign the account.
Once a transaction type has been assigned to the vendor, it will display in the right pane under Assigned Types.

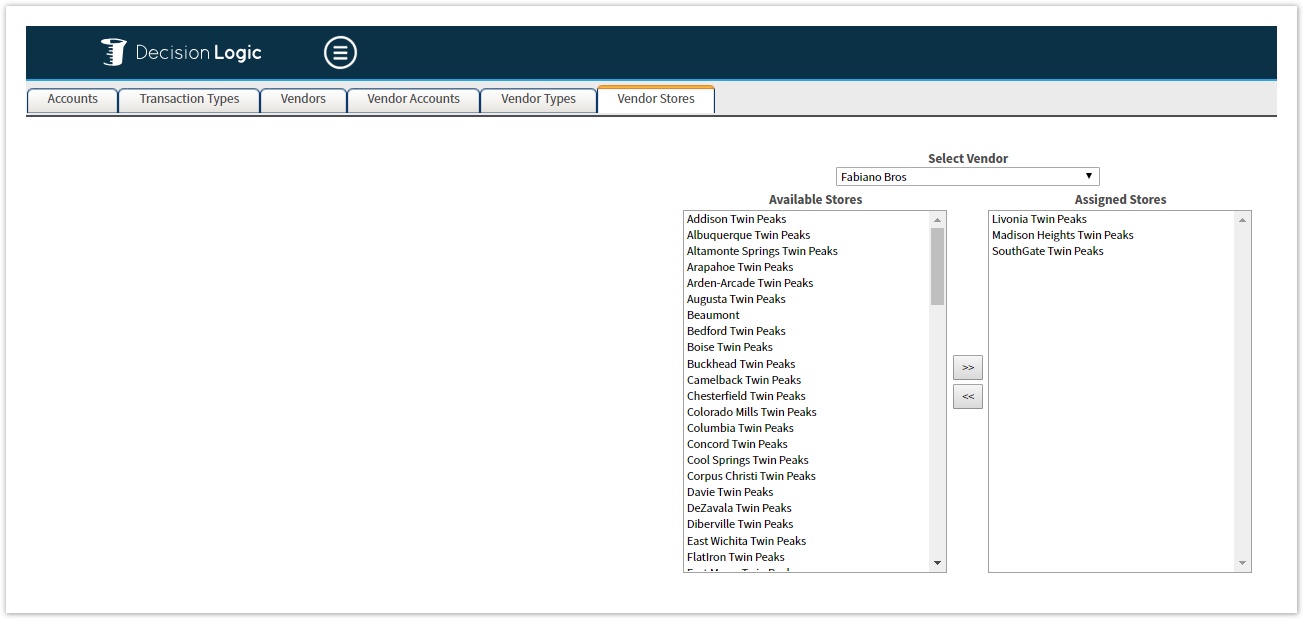
Vendor Store Assignment
Assign stores to the vendor. This will allow the store to enter invoices under Invoice Entry or Ordering Home Manual Receive check create invoice . Check “create invoice” where allowed.
Select a vendor from the drop-down
Select a Store the vendor will write to from the left pane of Available Stores one at a time and use the > “>” to assign the store to that vendor.
Once a store has been assigned to the vendor, it will display in the right pane under Assigned Stores.
Related Articles
Filter by label (Content by label)
© 2023 Knowledge Management Systems, LLC. Decision Logic. All Rights Reserved.
Table of Contents
| Table of Contents |
|---|
| Info |
|---|
For additional questions or assistance |
, please submit a support ticket by |
visiting the Decision Logic |